AgentConnect
 Welcome to the AgentConnect User Guide!
AgentConnect is a simple and powerful desktop application designed specifically for insurance agents like you. Managing your clients’ contacts, appointments, and policies has never been easier!
Why Choose AgentConnect?
- Easy to Use: AgentConnect combines the speed of typing commands with the ease of a visual interface, making it both powerful and user-friendly.
- Efficient Management: Quickly add, update, and organize your client information without the hassle of traditional address books.
- Stay Organized: Keep track of appointments and policy details all in one place, so you never miss an important date or update.
AgentConnect is designed with you in mind, ensuring that even if you’re not tech-savvy, you can start managing your clients effectively right away. Let AgentConnect help you save time and stay organized, so you can focus on what matters most—your clients.
Introduction
Table of Content: View all contents in this guide.
Quick Start: Get up and running with AgentConnect in no time.
Getting Started with AgentConnect: Learn the basics of using AgentConnect effectively.
Client Management: Navigate here for more information on how to manage your clients with ease.
Policy Management: Navigate here for more information on handling policy assignments and payments.
Search Functions: Navigate here for more information on how to quickly find client’s information.
Advanced Features: Enhance your workflow with advanced commands.
Frequently Asked Questions (FAQ): Common questions and answers about using AgentConnect.
Known Issues: List of current issues and their solutions.
Table of Contents
- Quick Start
- Getting Started
- Features
- Frequently Asked Questions (FAQ)
- Known Issues
- Command Summary
Quick start
- Ensure that you have Java 17 or above installed on your computer:
- Download the latest release version of AgentConnect. The application is a
.jarfile:- Get the latest version of AgentConnect from this link. Look for a file named
AgentConnect.jar.
- Get the latest version of AgentConnect from this link. Look for a file named
- Place the File:
- Move the
AgentConnect.jarfile to a home folder where you want to store the application and its data. - Note that the data folder created by the
.jarfile which stores the client data will be stored in the same home folder
- Move the
- Run the Application:
-
Option 1: Double-Click:
Simply double-click the
AgentConnect.jarfile to start the application. If this method does not work, try Option 2 below. -
Option 2: Use Command Prompt:
Open the Command Prompt (Windows) or Terminal (Mac/Linux), navigate to the folder containing the
AgentConnect.jarfile, and type:java -jar AgentConnect.jarFor example, if you stored the
AgentConnect.jarfile in the directoryC:/Users/Desktop/Applications, then run the following command:cd C:/Users/Desktop/Applications java -jar AgentConnect.jarTo learn more about directory navigation, refer to this link.
-
Option 1: Double-Click:
Simply double-click the
-
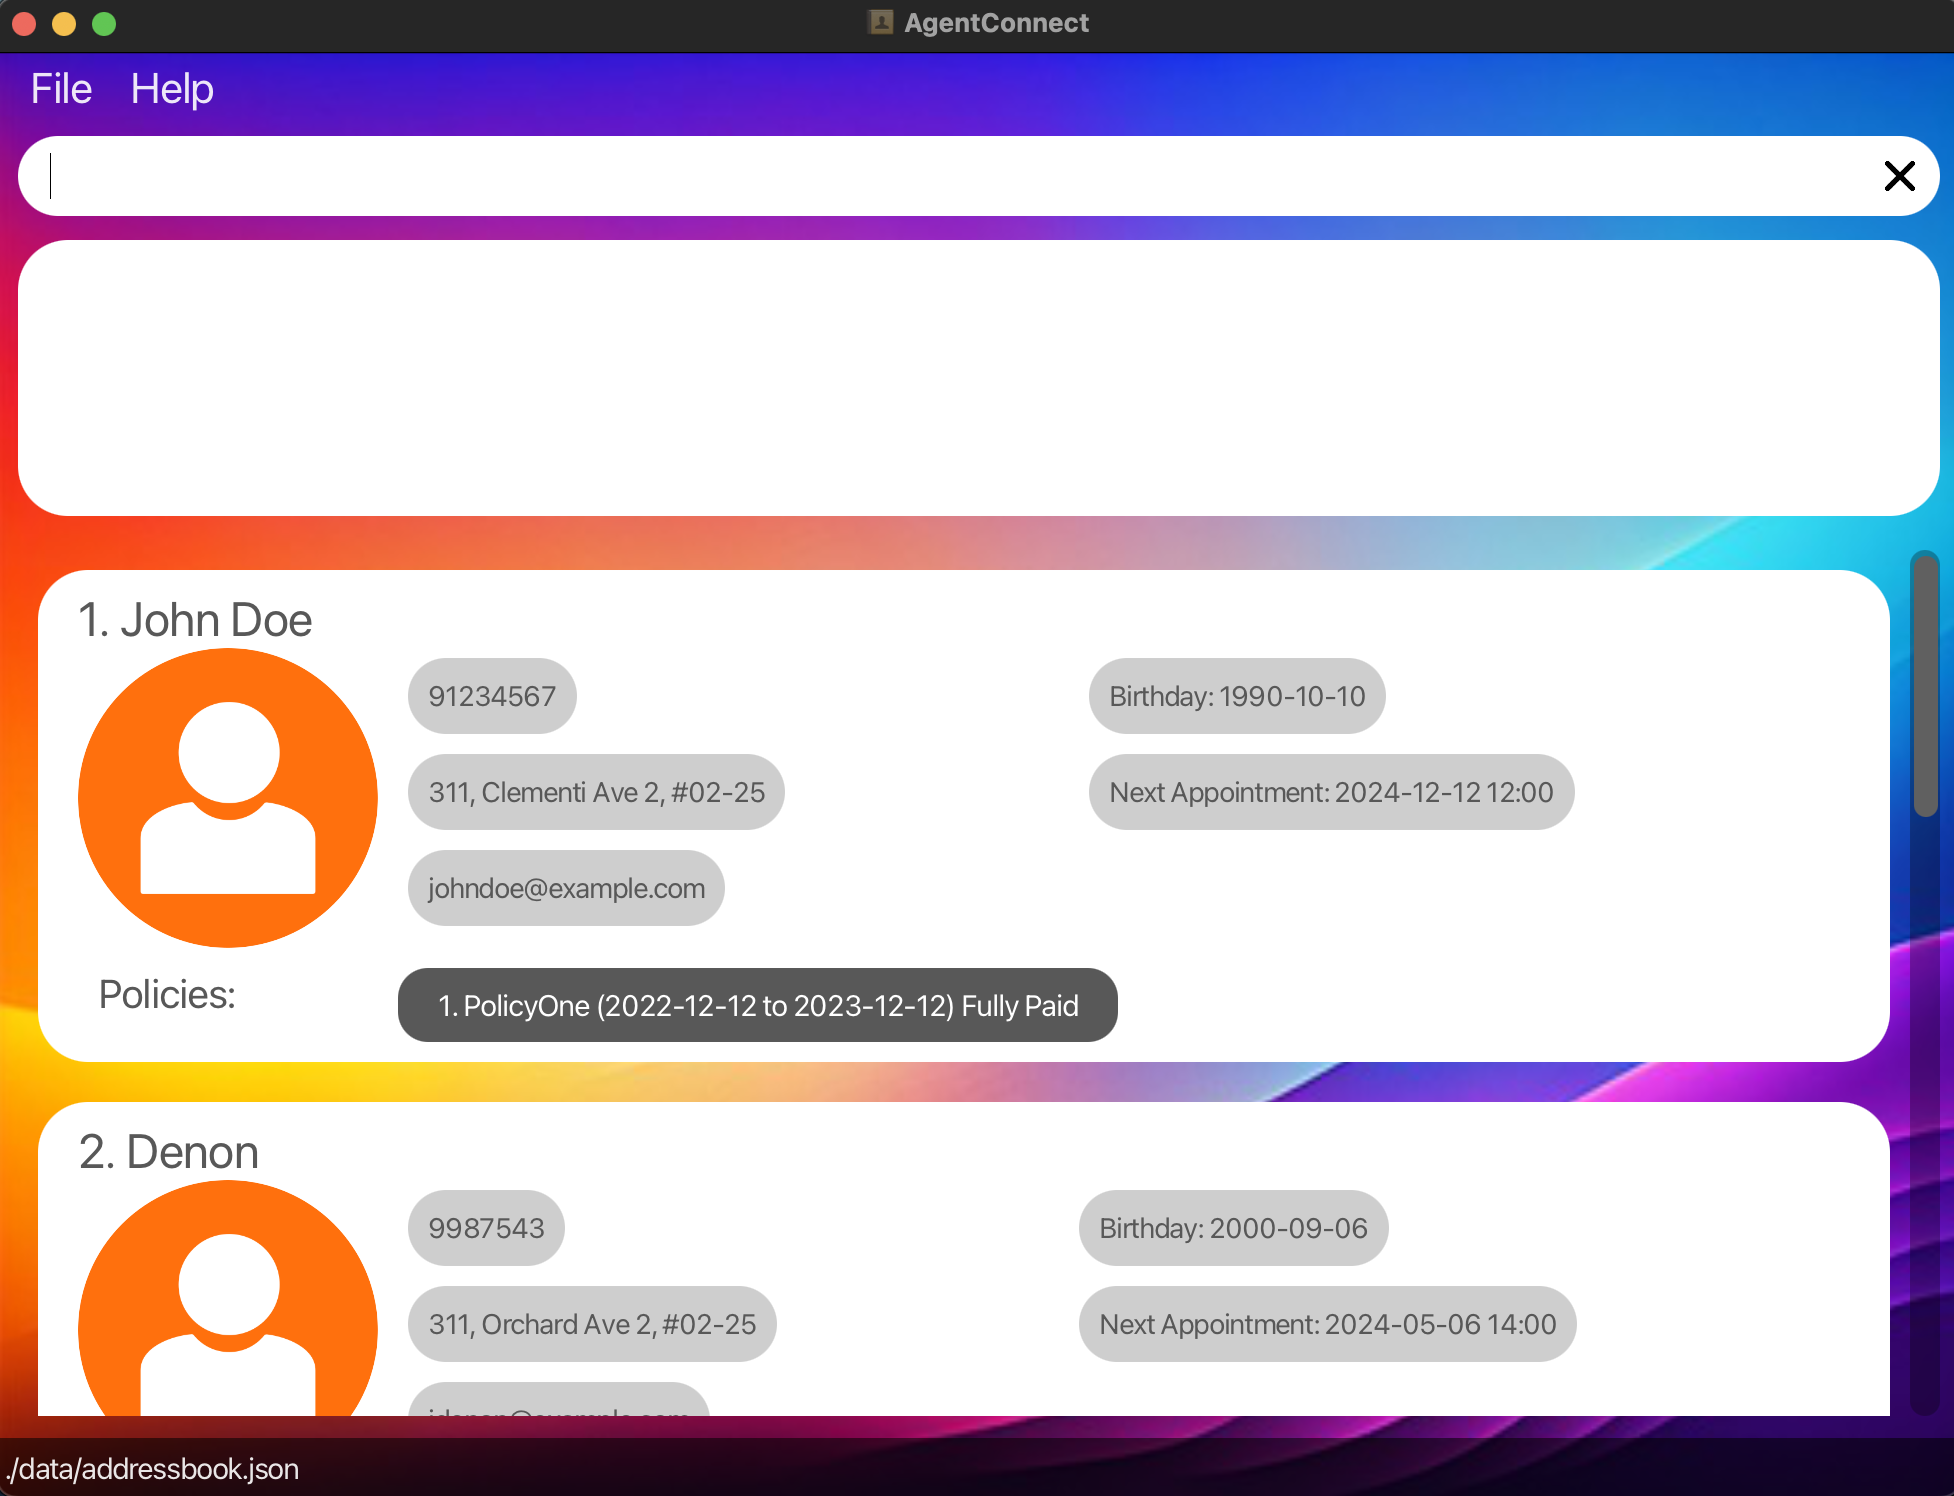
Application Interface: A user interface similar to the below should appear in a few seconds.
-
Try It Out:
-
Enter a Command:
Type a command into the command box and press Enter. For example, type
helpto see the help message. - Explore: Feel free to experiment with different commands.
-
Enter a Command:
Type a command into the command box and press Enter. For example, type
- Refer to the Features below for details of each command.
Getting Started
Understanding Command Format
Users engage with the AgentConnect application by inputting a series of commands. These commands enable a variety of actions, such as adding, updating, listing, and managing clients and policies, as well as retrieving client information like appointments and birthdays. This section will introduce some pointers to take note of when running commands.
-
Angle brackets <> are placeholders for information you need to provide. Example: In
add n/<NAME>, replaceNAMEwith the client’s name. -
Square brackets [ ] indicate optional items. Example:
n/<NAME> [t/TAG]means thet/TAGpart is optional. -
Ellipsis … means you can include the item multiple times or not at all. Example:
[t/TAG]...allows for multiple tags or none. -
The parameters for the commands does not matter and you can enter the parameters in any order. Example:
n/John p/123is the same asp/123 n/John. -
Extraneous parameters for commands that do not take in parameters (such as
help,list,exitandclear) will be ignored. e.g. if the command specifieshelp 123, it will be interpreted ashelp. - AgentConnect automatically checks and corrects dates to ensure that they are valid, helping to prevent scheduling errors.
- If a date is entered with an invalid day (eg.
2028-02-30), Agent Connect will adjust it to the nearest valid date within the month, such as2028-02-29. This intelligent replacement only applies to dates up to the 31st day of any month. - This applies to only adding, assigning and editing function only.
- If a date is entered with an invalid day (eg.
-
If you are using a PDF version of this document, be careful when copying and pasting commands that span multiple lines as space characters surrounding line-breaks may be omitted when copied over to the application.
-
Before every prefix, ensure that there is a whitespace at the front. Else, the command might not work. (E.g.
add n/John p/889955will work butadd n/Johnp/889955will not work.) - For commands that requires datetime input, ensure that there is a whitespace between the date and the time (E.g.
2024-10-10 13:00)
Viewing Help : help
Shows a message explaining how to access the help page.

Format: help
Saving the data
AgentConnect data are saved in the hard disk automatically after any command that changes the data. There is no need to save manually.
Exiting the program : exit
Exits the program.
Format: exit
Features
AgentConnect offers a range of features to help you manage your clients effectively. You can navigate to each section below:
Client Management
The client management section contain commands that allows you to interact with your client’s information. Each client contains the following fields: Name, phone number, home address, email address, birthday and next appointment.
| Action | Command Format | Command Example |
|---|---|---|
| Adding a Client | add n/<NAME> p/<PHONE_NUMBER> e/<EMAIL> addr/<ADDRESS> b/<BIRTHDAY> appt/<APPOINTMENT> |
add n/John Doe p/91234567 e/john@example.com addr/123 Street b/1990-01-01 appt/2024-12-12 14:00 |
| Listing All Clients | list |
list |
| Deleting a Client |
delete <INDEX> or delete <NAME> Example: delete 3 or delete John Doe
|
delete 3 or delete John Doe
|
| Editing Client Details | edit INDEX [n/NAME] [p/PHONE] [e/EMAIL] [addr/ADDRESS] [b/BIRTHDAY] [appt/APPOINTMENT] [po/POLICY_INDEX pon/POLICY_NAME pos/START_DATE poe/END_DATE paydate/PAYMENT_DUE_DATE amt/AMOUNT_DUE] |
edit 2 p/98765432 |
| Sorting Clients | sort <CRITERIA> <ORDER> |
sort b/ asc |
Adding a client : add
Adds a client to the address book.
Format:
add n/<NAME> p/<PHONE NUMBER> e/<EMAIL ADDRESS> addr/<HOME ADDRESS> b/<BIRTHDAY> appt/<APPOINTMENT TIME>
-
Parameters:
- Name can only contain alphanumeric and spaces.
- Birthday should be in
yyyy-mm-ddand only can be a date before today’s date. - Appointment should be in
yyyy-mm-dd HH:mmand accept only future dates. - Phone number can only be 3 to 8 digits long.
- Client’s name can contain whitespaces.
John DoeandJohn Doewill be considered as 2 different client. - Clients with the same name and address are considered as duplicates.
- Do note that the names are case-sensitive.
- The system standardises addresses by removing special characters such as commas, spaces, and hyphens and making all characters lowercase. This means that “311, Clementi Ave 5, unit 02-2” and “311 Clementi ave 5 unit 022” (without commas) will be treated as the same client address.
Example:
- The command below adds a new client to the client list with the following information:
- Client name: Betsy Crowe
- Client number: 1234567
- Client email: betsycrowe@example.com
- Home address: Newgate Prison
- Client birthday: 2001-10-10
- Client next appointment: 2024-12-01 09:00
add n/Betsy Crowe e/betsycrowe@example.com addr/Newgate Prison p/1234567 b/2001-10-10 appt/2024-12-01 09:00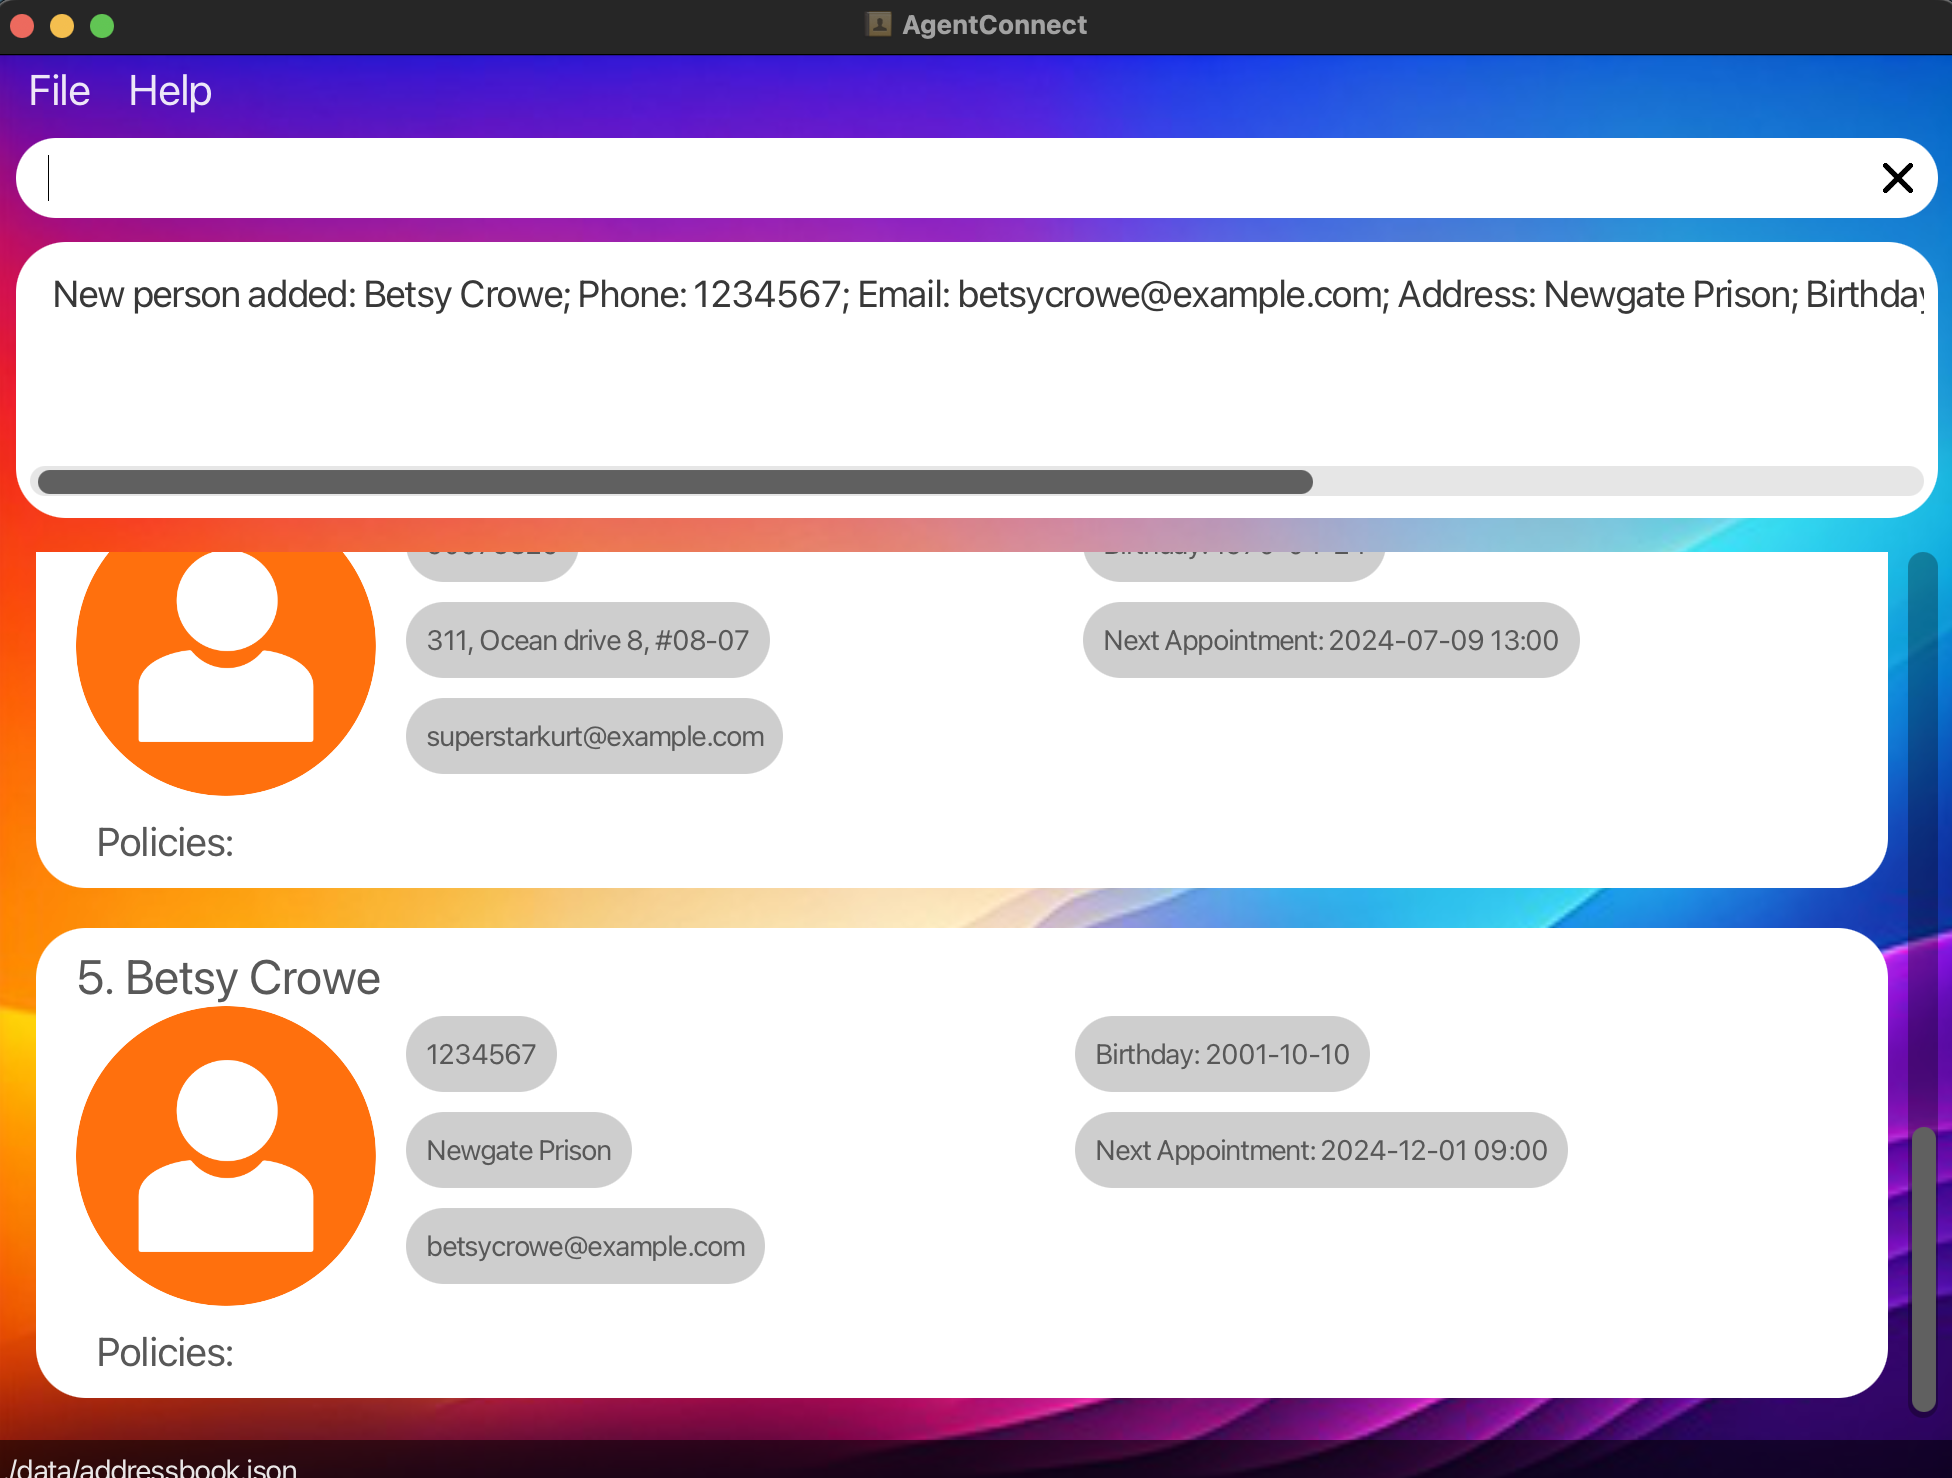 —
—
Deleting a client : delete
Deletes the specified client from the application. There is a confirmation message before the deletion is executed. Type y and press enter to confirm deletion.
Format: delete <INDEX> or delete <NAME>
-
Parameters:
- Deletes the client at the specified
INDEXor the specificNAME. - The index and name refers to the index number or name shown in the displayed client list.
- The index must be a positive integer 1, 2, 3, …
- Any input after the first index will be ignored. Eg.
delete 1 2ordelete 1 testwill be interpreted asdelete 1. - The name of the client is case-sensitive and must be an exact match.
- Deletes the client at the specified
Examples:
-
find Denonfollowed bydelete 3deletes the 3rd client in the results of thefindcommand.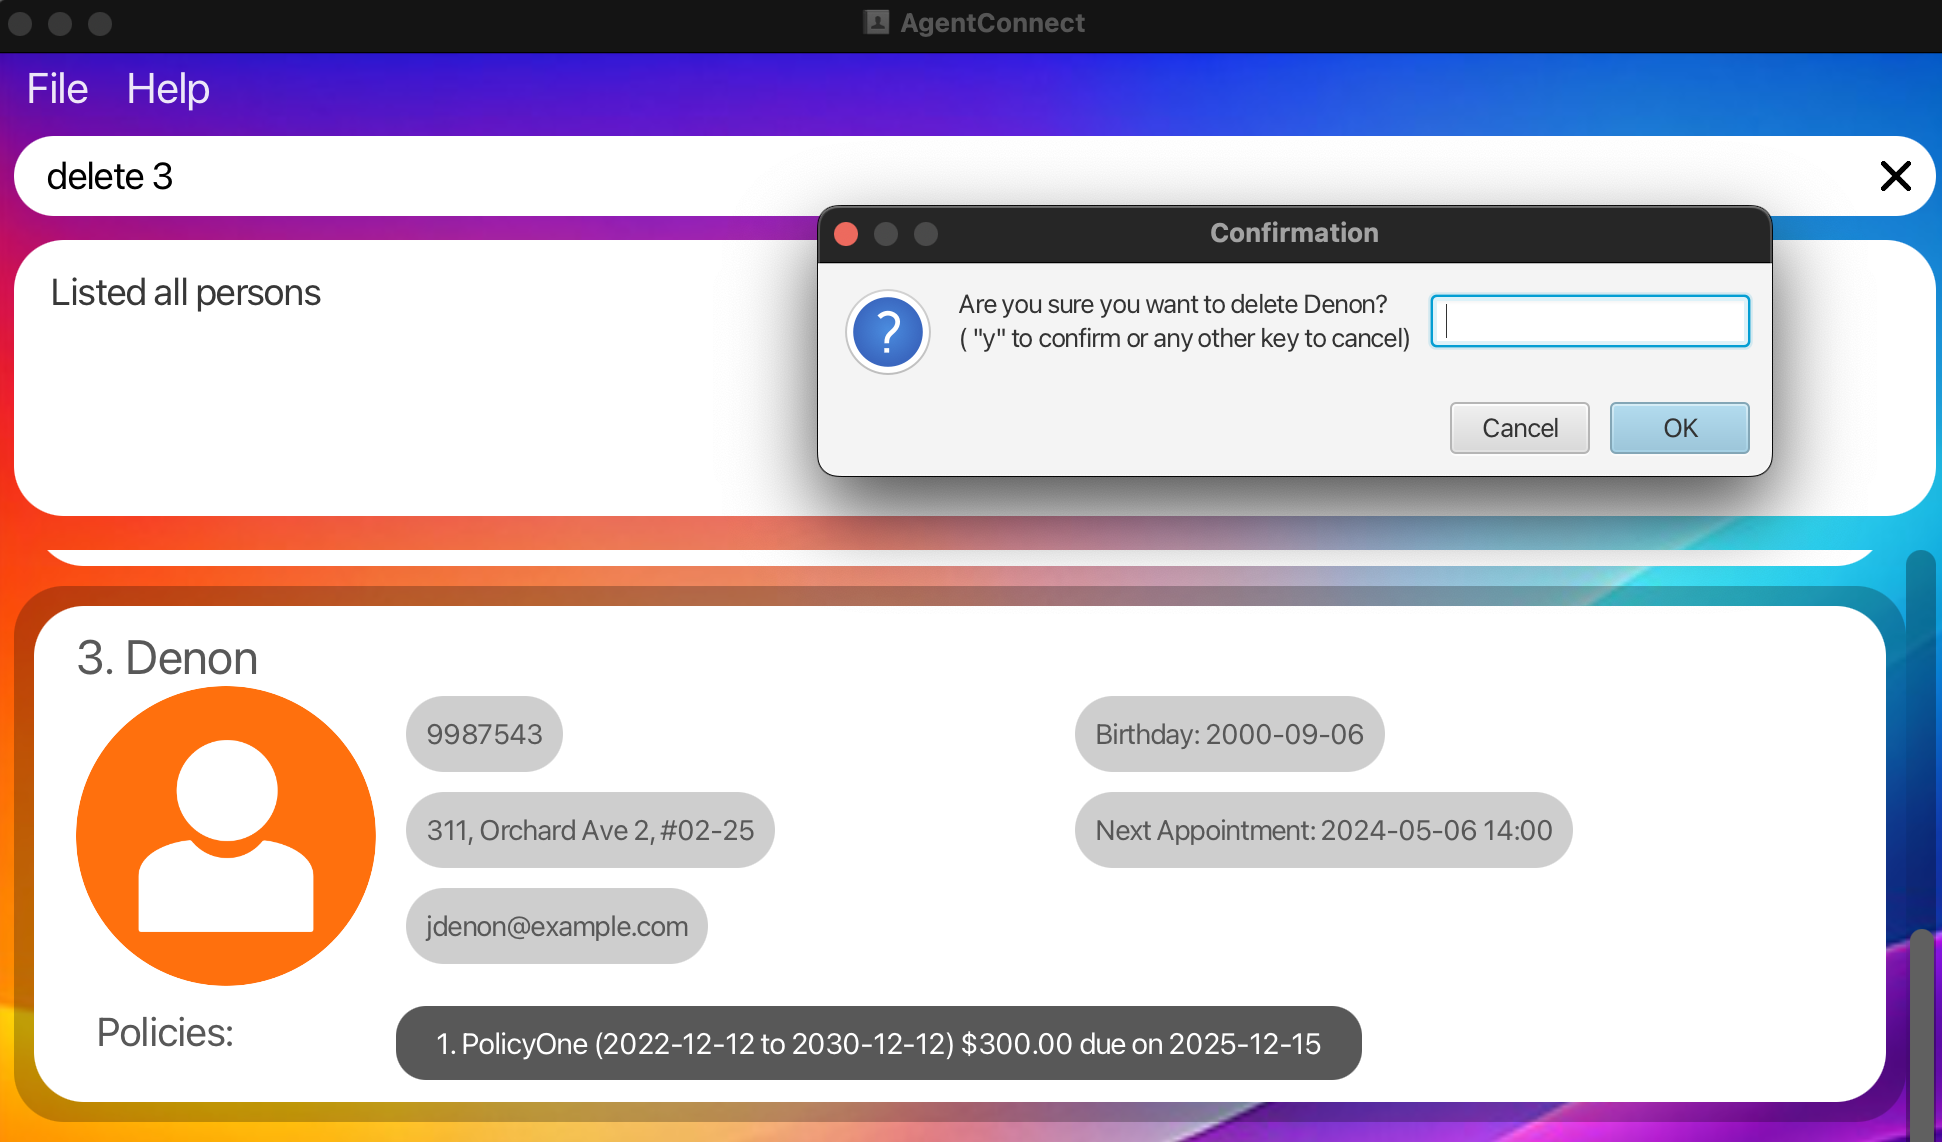
-
Delete the client named
Betsy Crowefrom the list of the address book.delete Betsy Crowe
Listing all clients : list
Shows a list of all clients in the address book.
Format: list
Editing a client details : edit
Edits an existing client in the address book.
Format:
edit INDEX [n/NAME] [p/PHONE] [e/EMAIL] [a/ADDRESS] [t/TAG] [b/BIRTHDAY] [appt/APPOINTMENT] [po/POLICY_INDEX pon/POLICY_NAME pos/START_DATE poe/END_DATE paydate/PAY_DATE amt/AMOUNT]…
-
Parameters:
- Edits the client at the specified
INDEX. The index refers to the index number shown in the displayed client list. The index must be a positive integer 1, 2, 3, … - At least one of the optional fields must be provided.
- Clients with the same name and address are considered as duplicates.
- Existing values will be updated to the input values.
- When editing tags, the existing tags of the client will be removed i.e adding of tags is not cumulative.
- You can remove all the client’s tags by typing
t/without specifying any tags after it. - When editing birthday and policy, the date format should be
yyyy-mm-dd - When editing appointment, the date and time format should be
yyyy-mm-dd hh:mmin 24-hour notation - When editing policy, all fields of policy must be included
- Edits the client at the specified
Examples:
-
Edits the phone number and email address of the 1st client to be
91234567andjohndoe@example.comrespectively.:edit 1 p/91234567 e/johndoe@example.com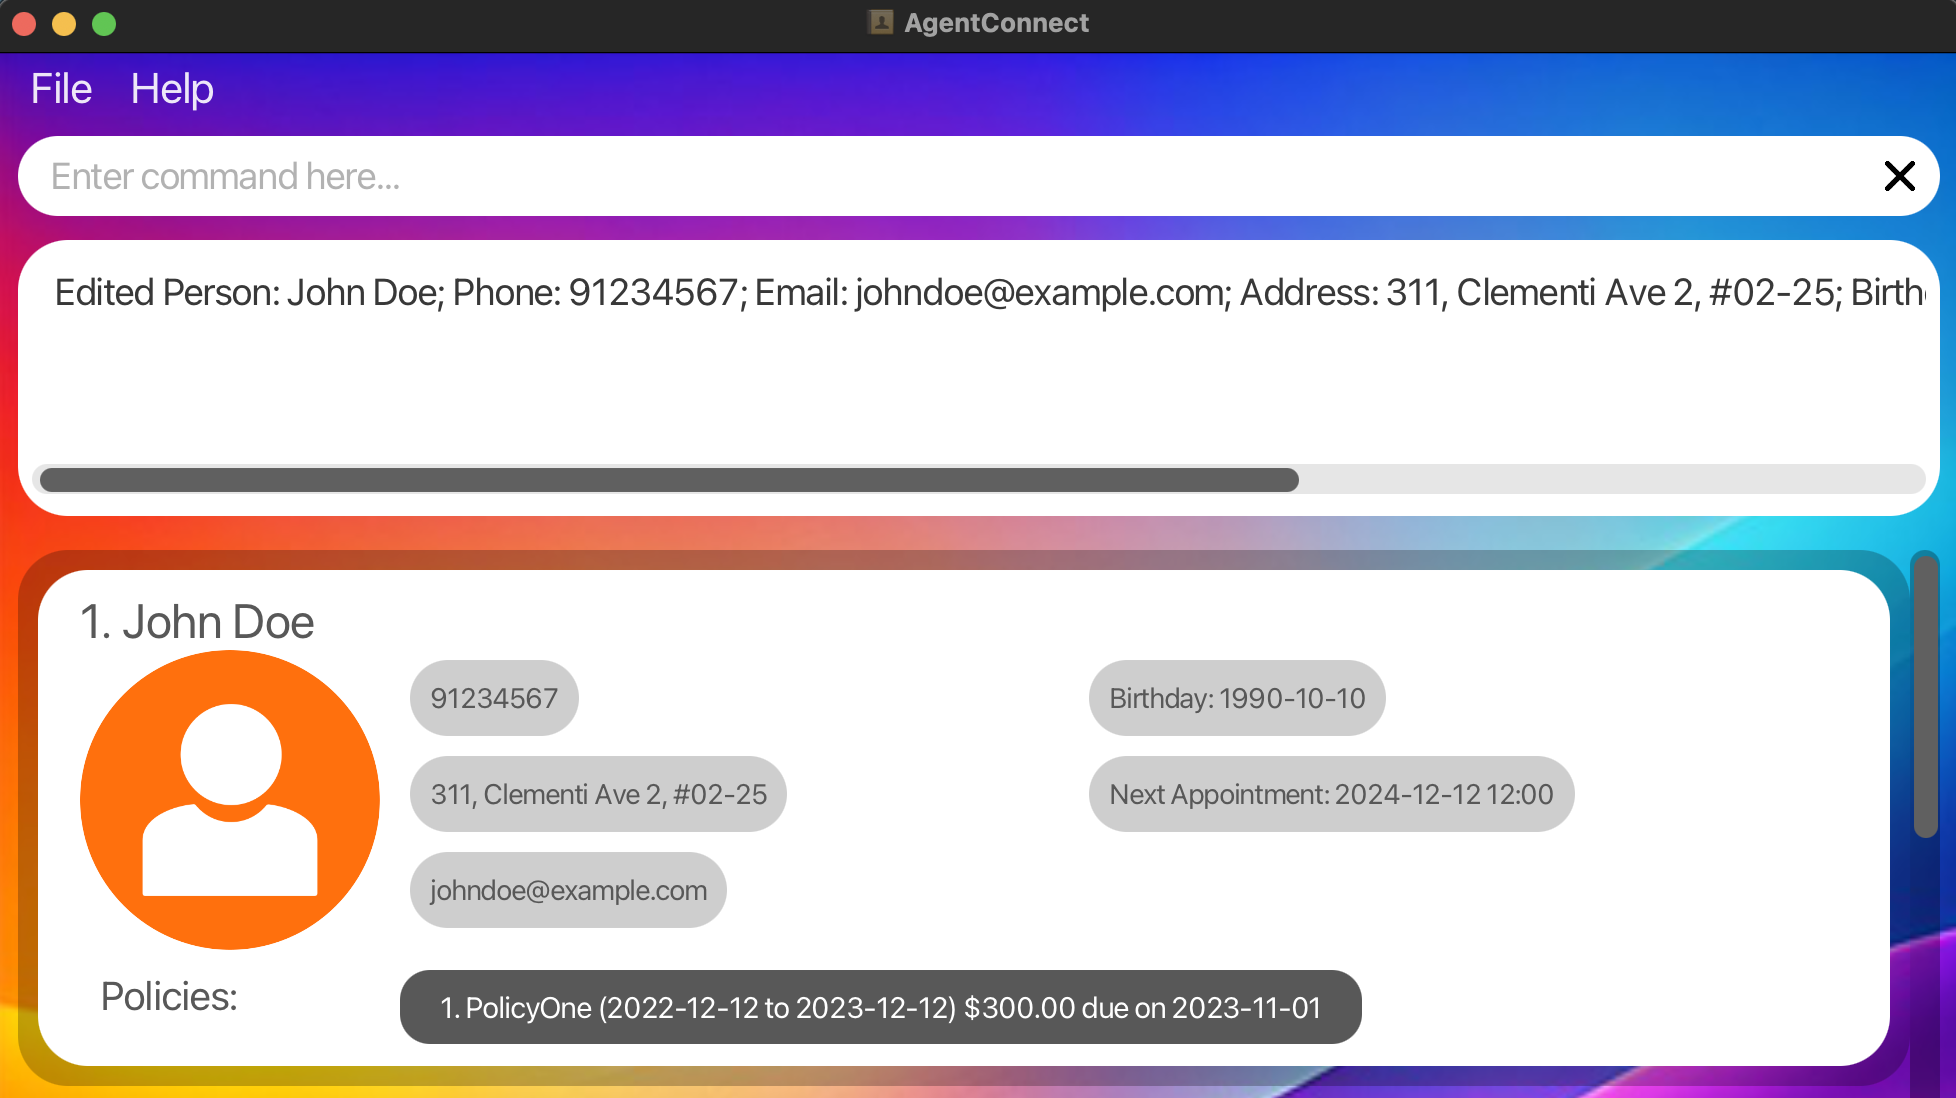
-
Edits the name of the 2nd client to be
Betsy Crowerand clears all existing tags.:edit 2 n/Betsy Crower t/ -
Edits the 1st policy of the 3rd client to be
Health Insurancewhich covers from2024-10-19to2025-10-19. The pay date changes to2024-11-19and premium amount changes to200:edit 3 po/1 pon/Health Insurance pos/2024-10-19 poe/2025-10-19 paydate/2024-11-19 amt/200
Sorting clients : sort
Organizes your client list based on different criteria for easier management and viewing.
Format:
sort <CRITERIA> <ORDER>
-
Parameters:
-
CRITERIA: The attribute by which you want to sort the clients. Available criteria include:-
n/: Sort by client’s name (A-Z or Z-A). -
b/: Sort by client’s birthday (earliest to latest or latest to earliest). -
appt/: Sort by upcoming appointment date (soonest to latest or latest to soonest). -
paydate/: Sort by policy payment due date (soonest to latest).
-
-
ORDER: The direction of sort. Available order includes:-
asc: Sort in ascending order -
desc: Sort in descending order
-
-
-
Usage:
- Name Sorting: Orders the client list alphabetically by names.
- Birthday Sorting: Orders the client list by birthday dates.
- Appointment Sorting: Orders the client list by the dates of upcoming appointments.
- Payment Due Date Sorting: Orders the client list by the policy payment due dates. This sort can only be used in ascending order.
Examples:
-
Sort by Name in Ascending Order: Sorts the client list alphabetically by each client’s name.
sort n/ asc
-
Sort by Birthday in Ascending Order: Sorts the client list from the earliest to the latest birthday.
sort b/ asc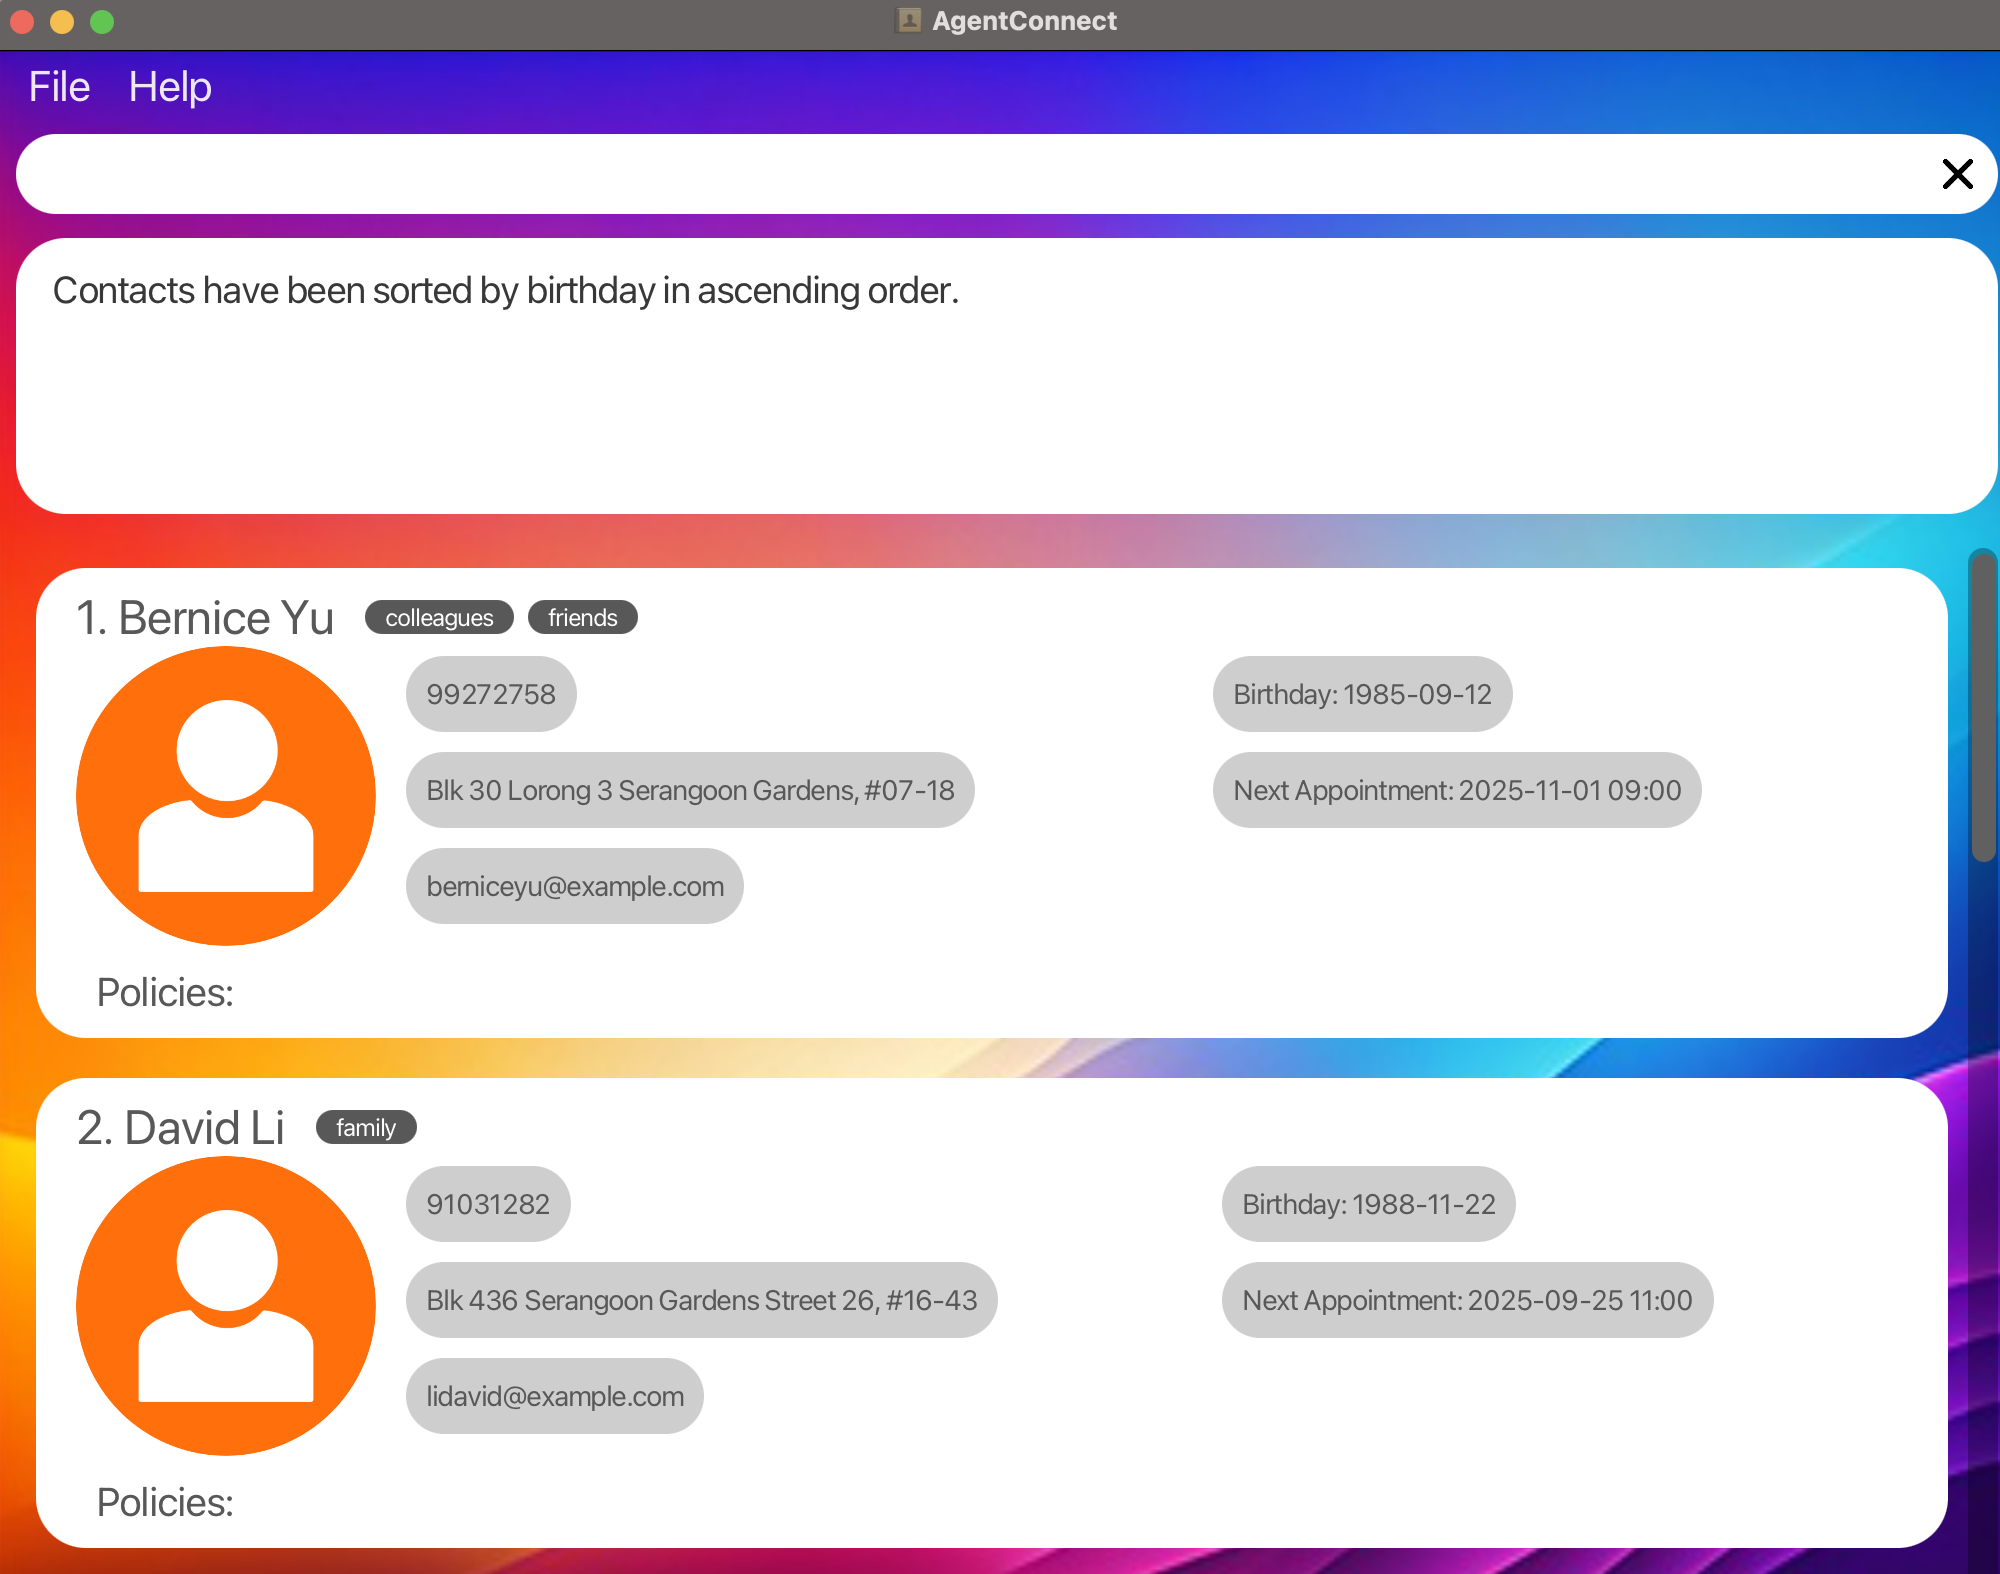
-
Sort by Appointment Date in Descending Order: Sorts the client list based on the latest to the earliest upcoming appointment.
sort appt/ desc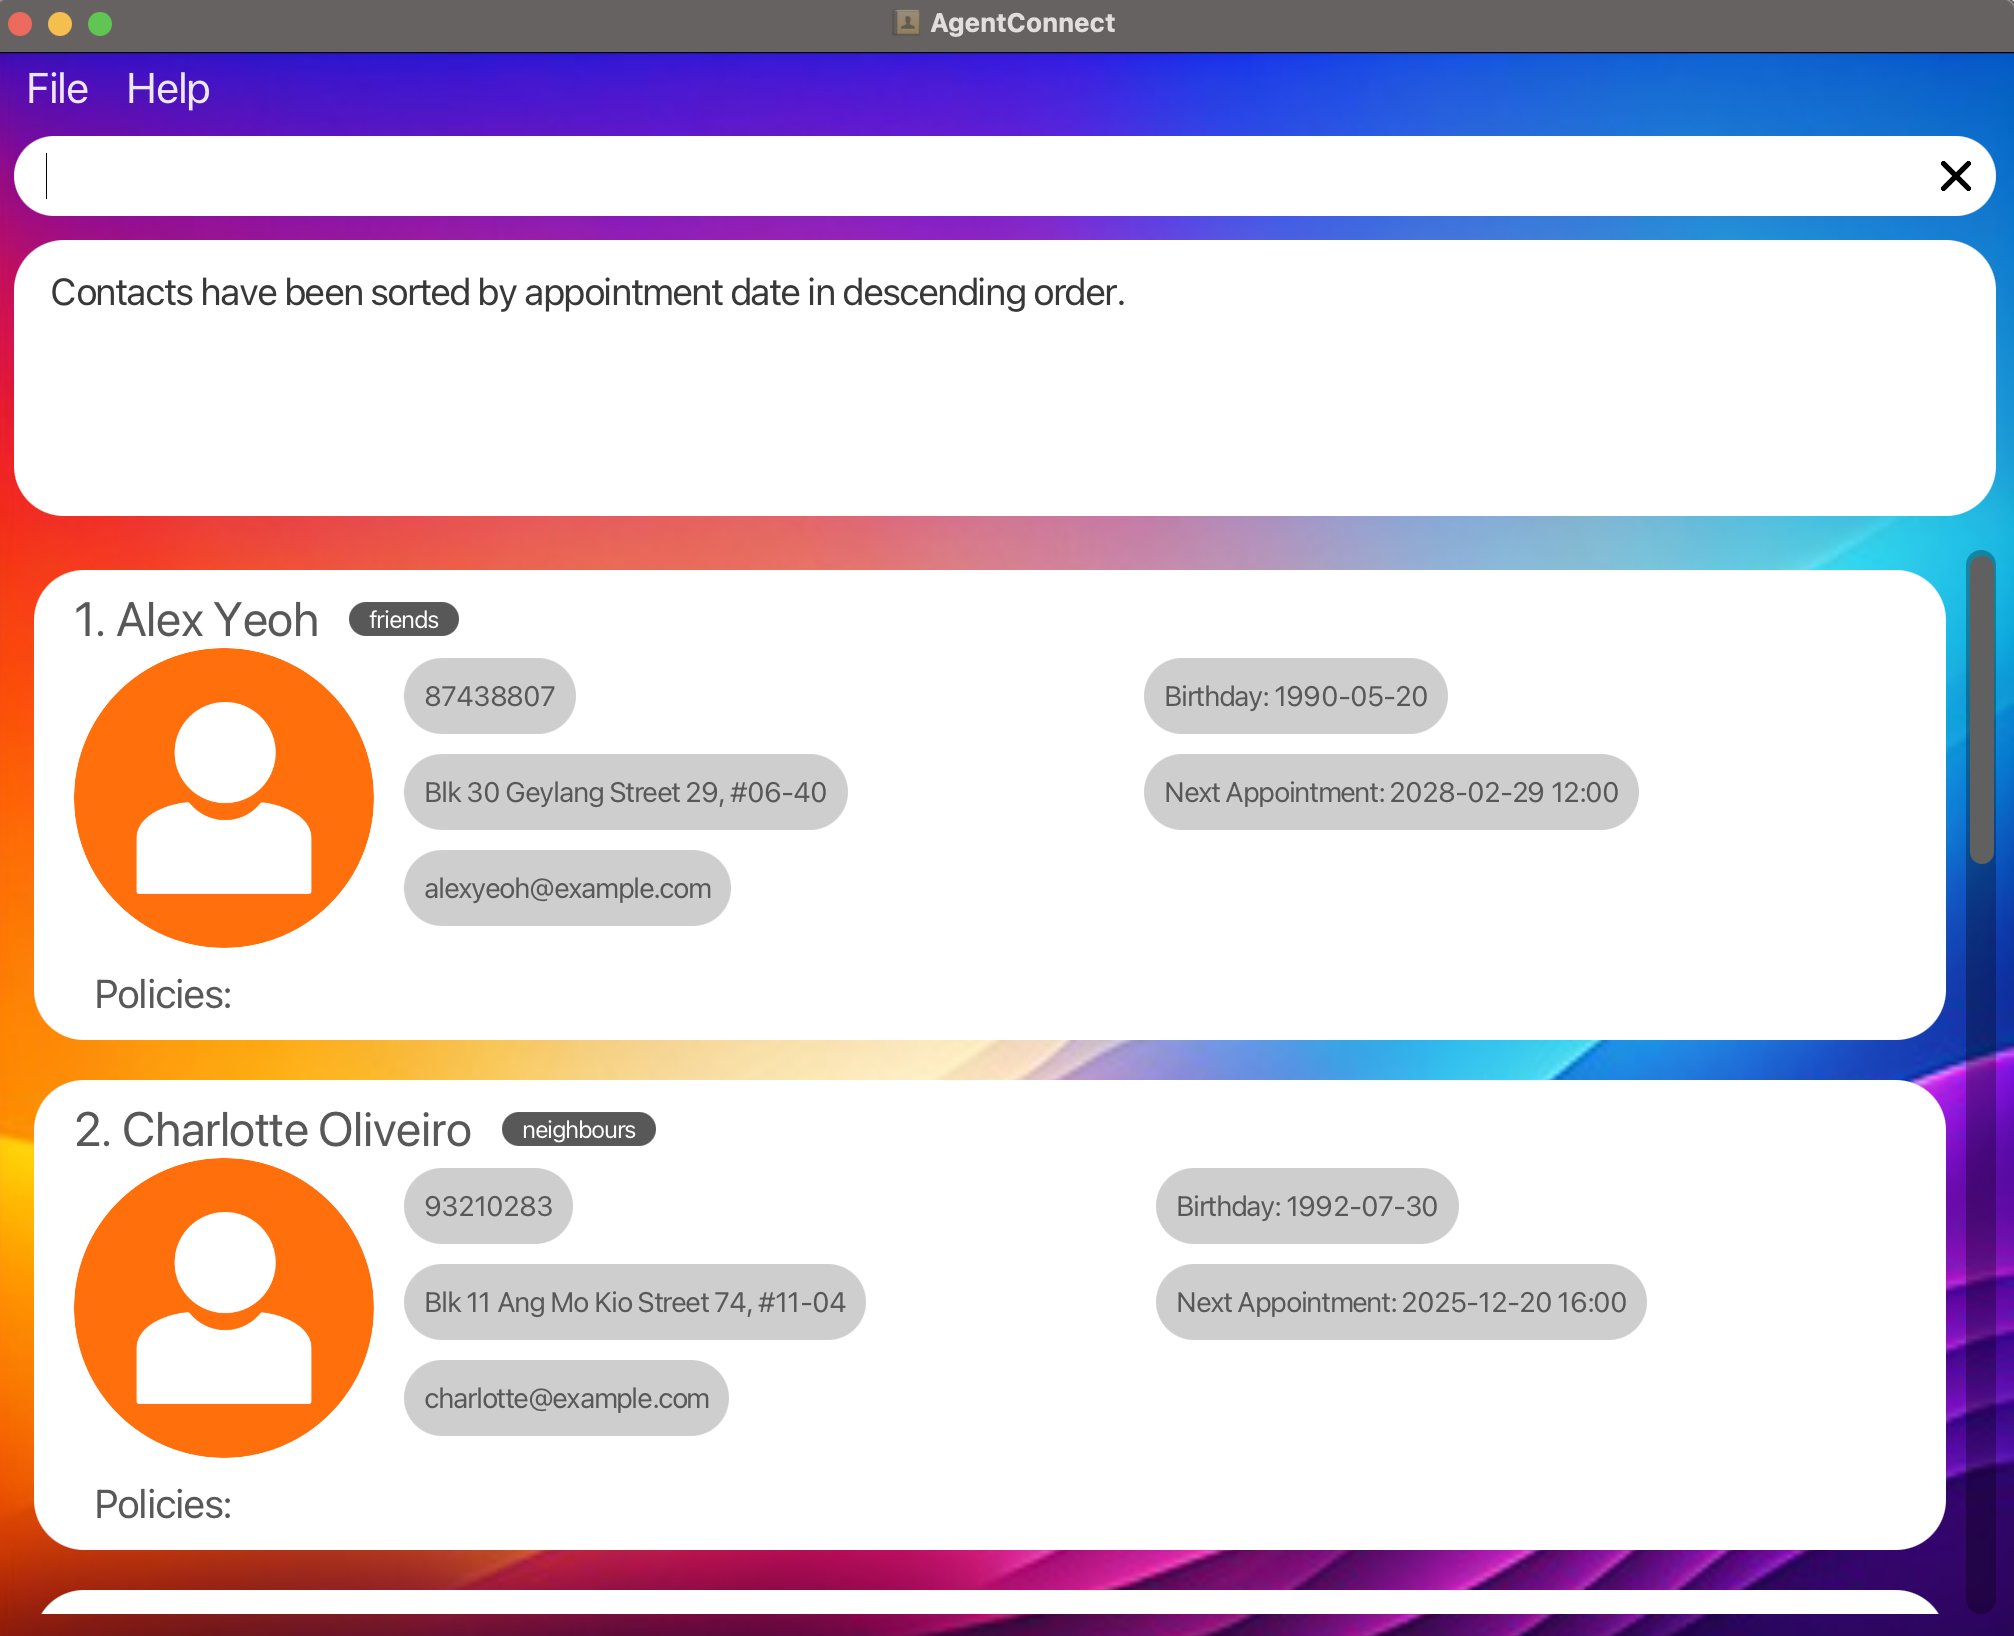
-
Sort by Policy Payment Due Date in Ascending Order: Sorts the client list based on the earliest to the latest payment due date of the policy.
sort paydate/ asc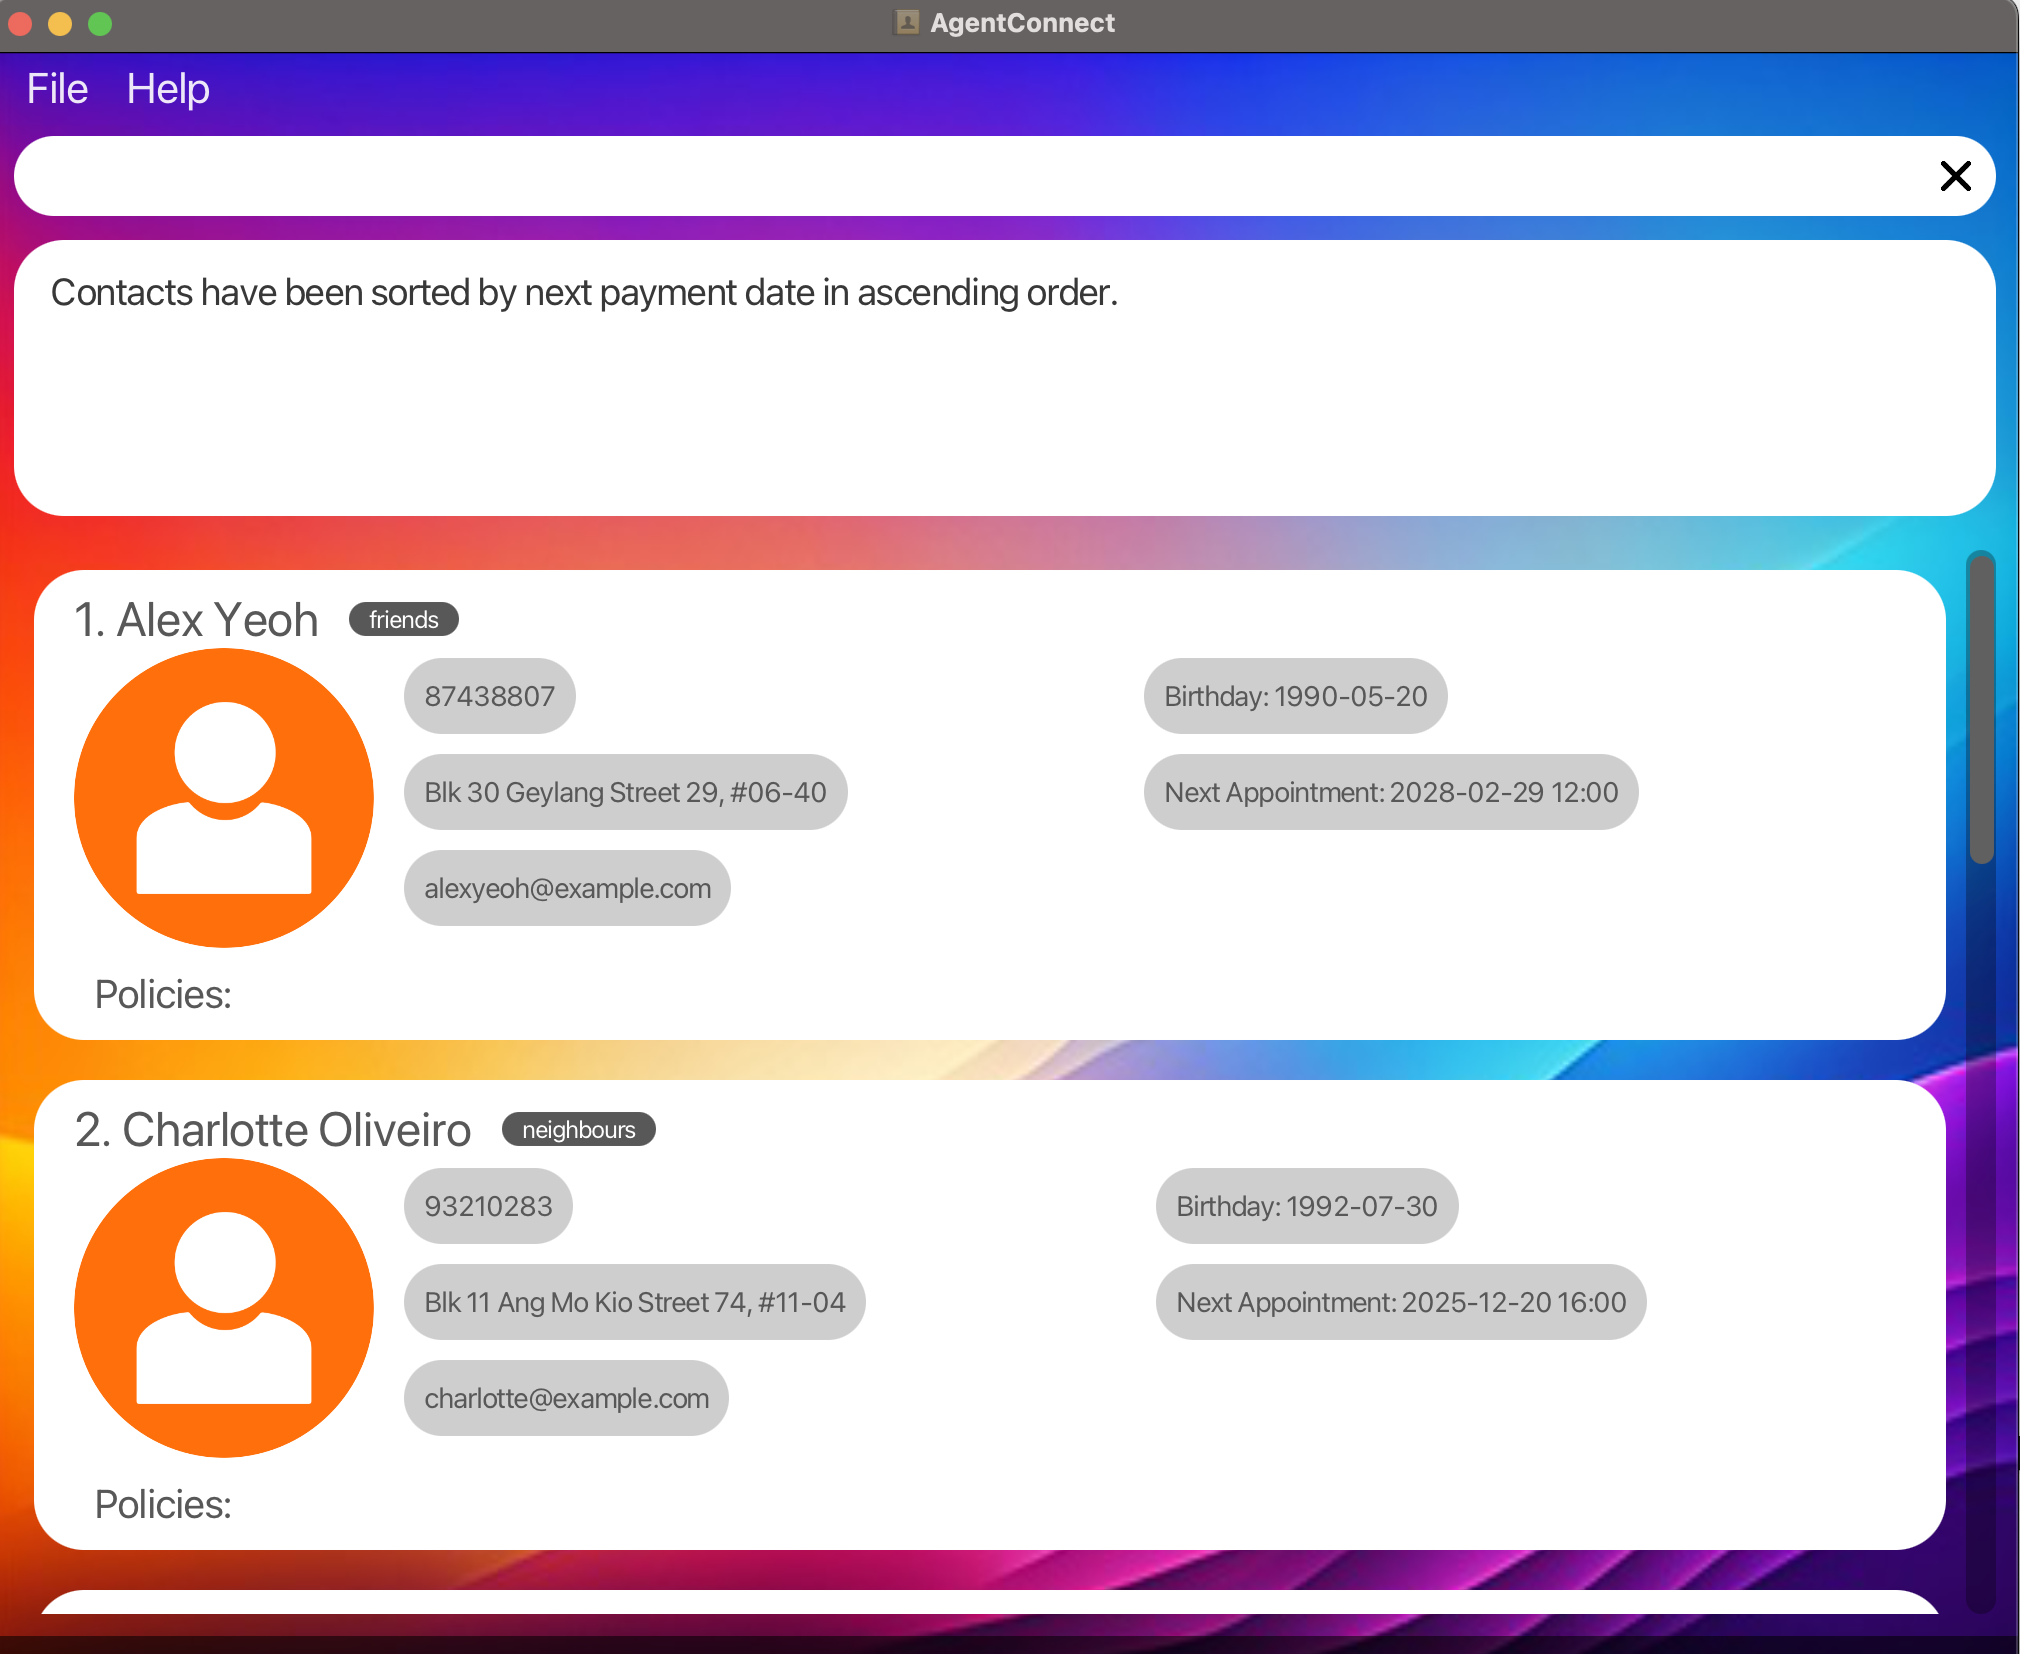
Search Functions
The search function section contain commands that allows you to search client-specific information, such as appointments, birthday and policies.
| Action | Command Format | Command Example |
|---|---|---|
| Find Clients | find <KEYWORD> [MORE_KEYWORDS] |
find Alice |
| Search Appointment | search a/ <DATETIME> |
search a/ 2024-10-10 23:00 |
| Search Birthday | search b/ <DATE> |
search b/ 2000-03-15 |
| Search Policy | search p/ <POLICY_NAME> |
search p/ sample Policy |
Locating clients by name : find
Finds clients whose names contain any of the given keywords.
Format:
find <KEYWORD> [MORE_KEYWORDS]
-
Parameters:
- The search is case-insensitive. e.g
hanswill matchHans - The order of the keywords does not matter. e.g.
Hans Bowill matchBo Hans - Only the name is searched.
- Only full words will be matched e.g.
Hanwill not matchHans - Clients matching at least one keyword will be returned (i.e.
ORsearch). e.g.Hans Bowill returnHans Gruber,Bo Yang
- The search is case-insensitive. e.g
Examples:
-
Search by Specific Keyword: Finds all client’s name that contains the keyword.
find steven kurt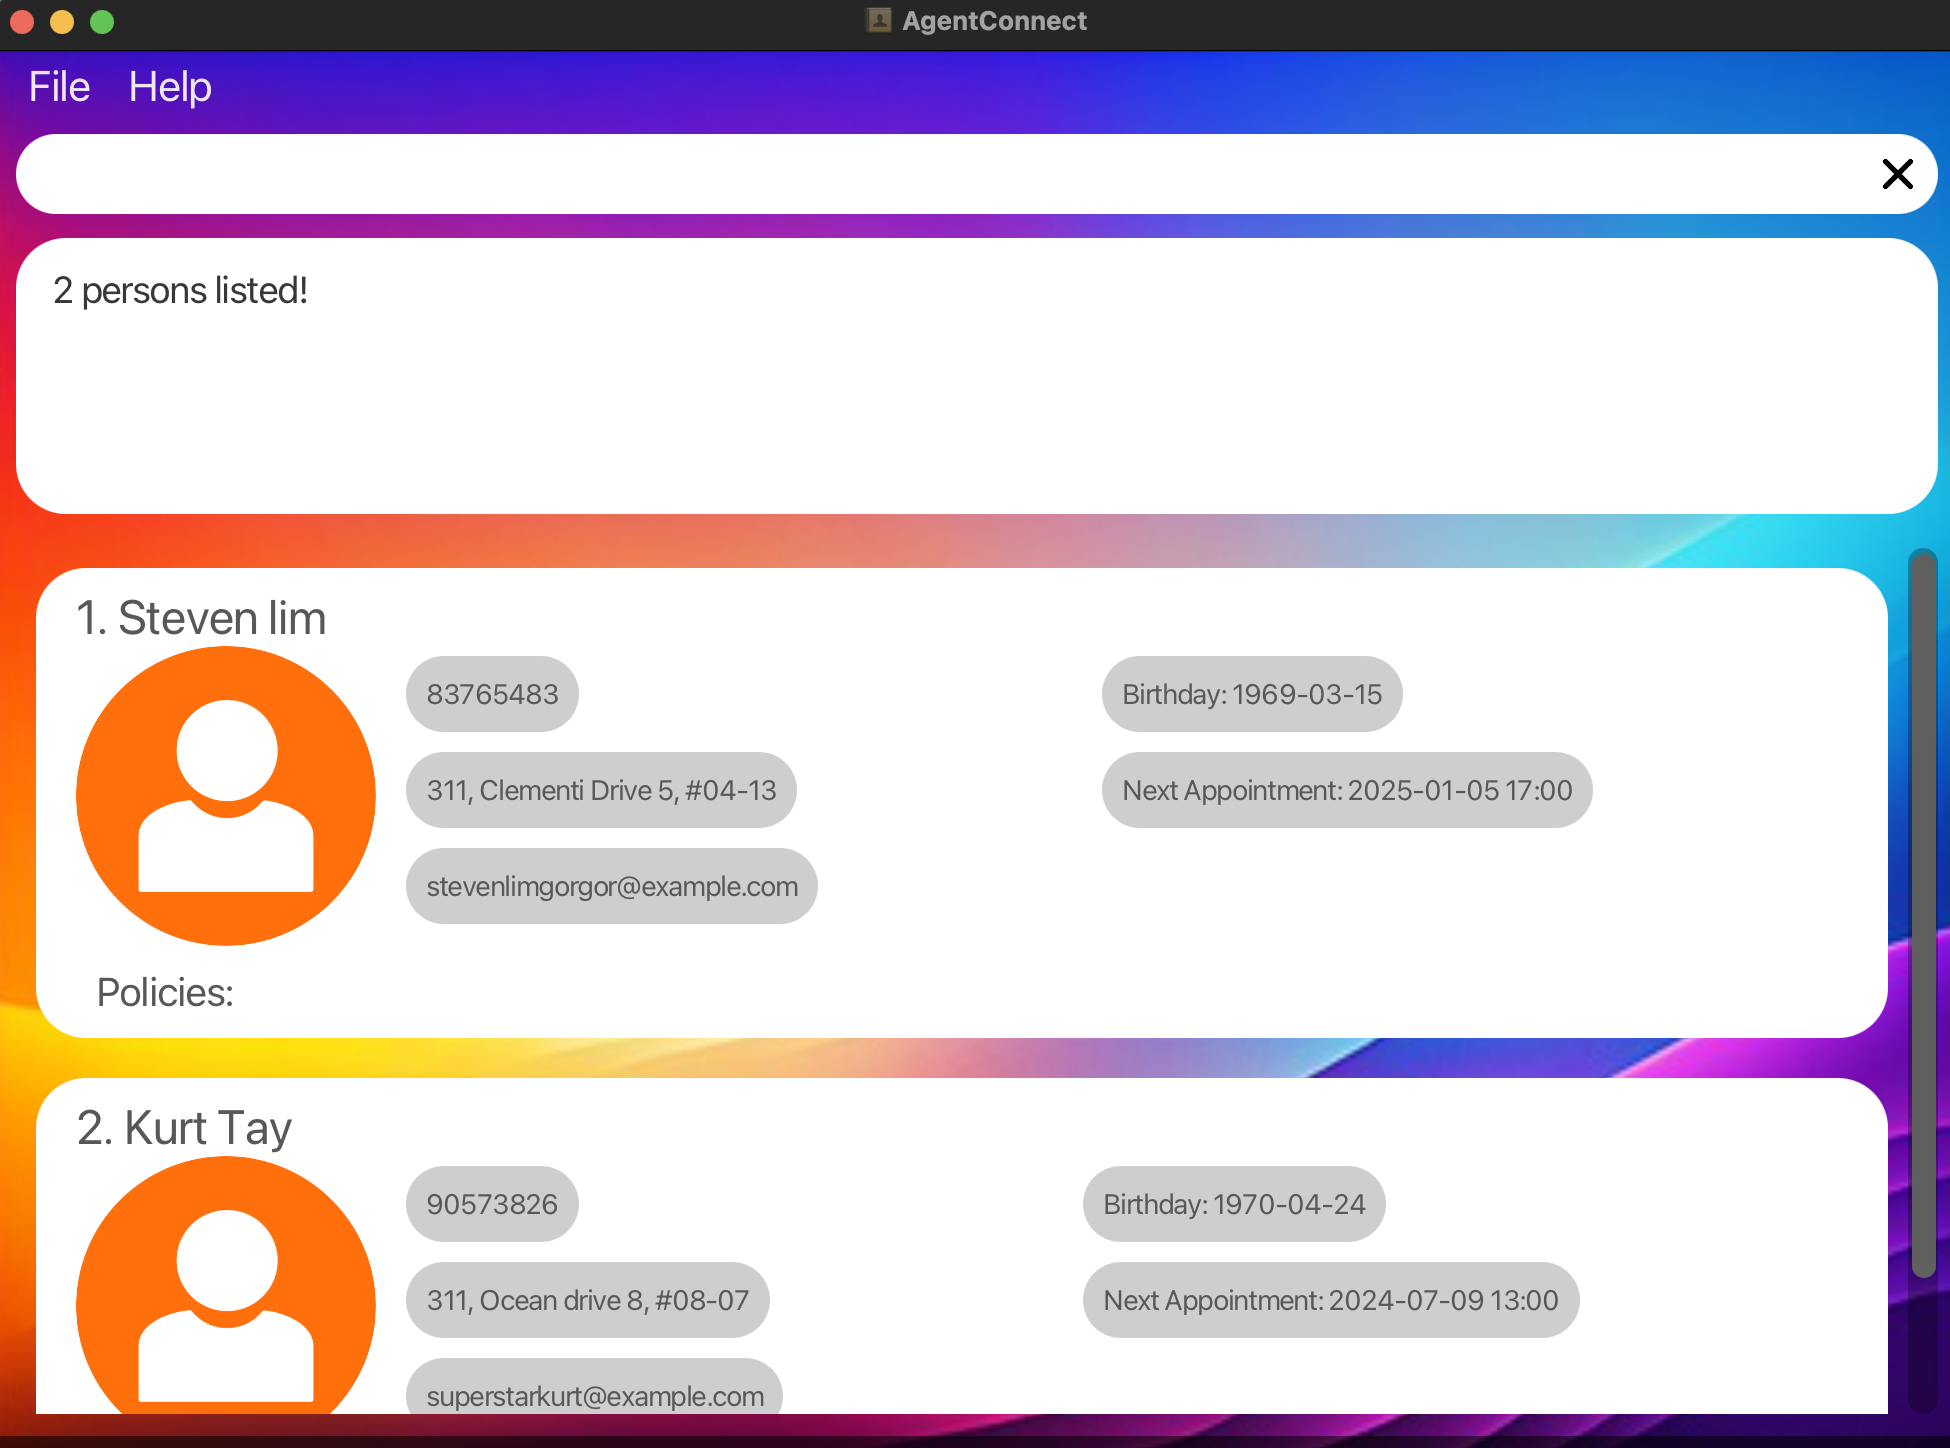
Searching appointments : search a/
Finds clients with appointments on a specific date or within a date range.
Format:
Single datetime search:
search a/ <DATETIME>
Range datetime search:
search a/ <START DATETIME> to <END DATETIME>
-
Parameters:
-
DATETIME: A specific date and time inyyyy-mm-dd HH:mmformat. -
START DATETIME: A specific start date and time inyyyy-mm-dd HH:mmformat. -
END DATETIME: A specific end date and time inyyyy-mm-dd HH:mmformat.
-
-
Usage:
- Single Datetime Search: Lists all clients with appointments on the specified date and time.
- Range Datetime Search: List all clients with appointments that is within the given date and time range.
Examples:
-
Search by Specific Datetime: Finds all clients with appointments on May 06, 2024, 2PM.
search a/ 2024-05-06 14:00
-
Search by Range Datetime: Finds all clients with appointments from January 01, 2024, 12AM to December 31, 2024, 11.59PM.
search a/ 2024-01-01 00:00 to 2024-12-31 23:59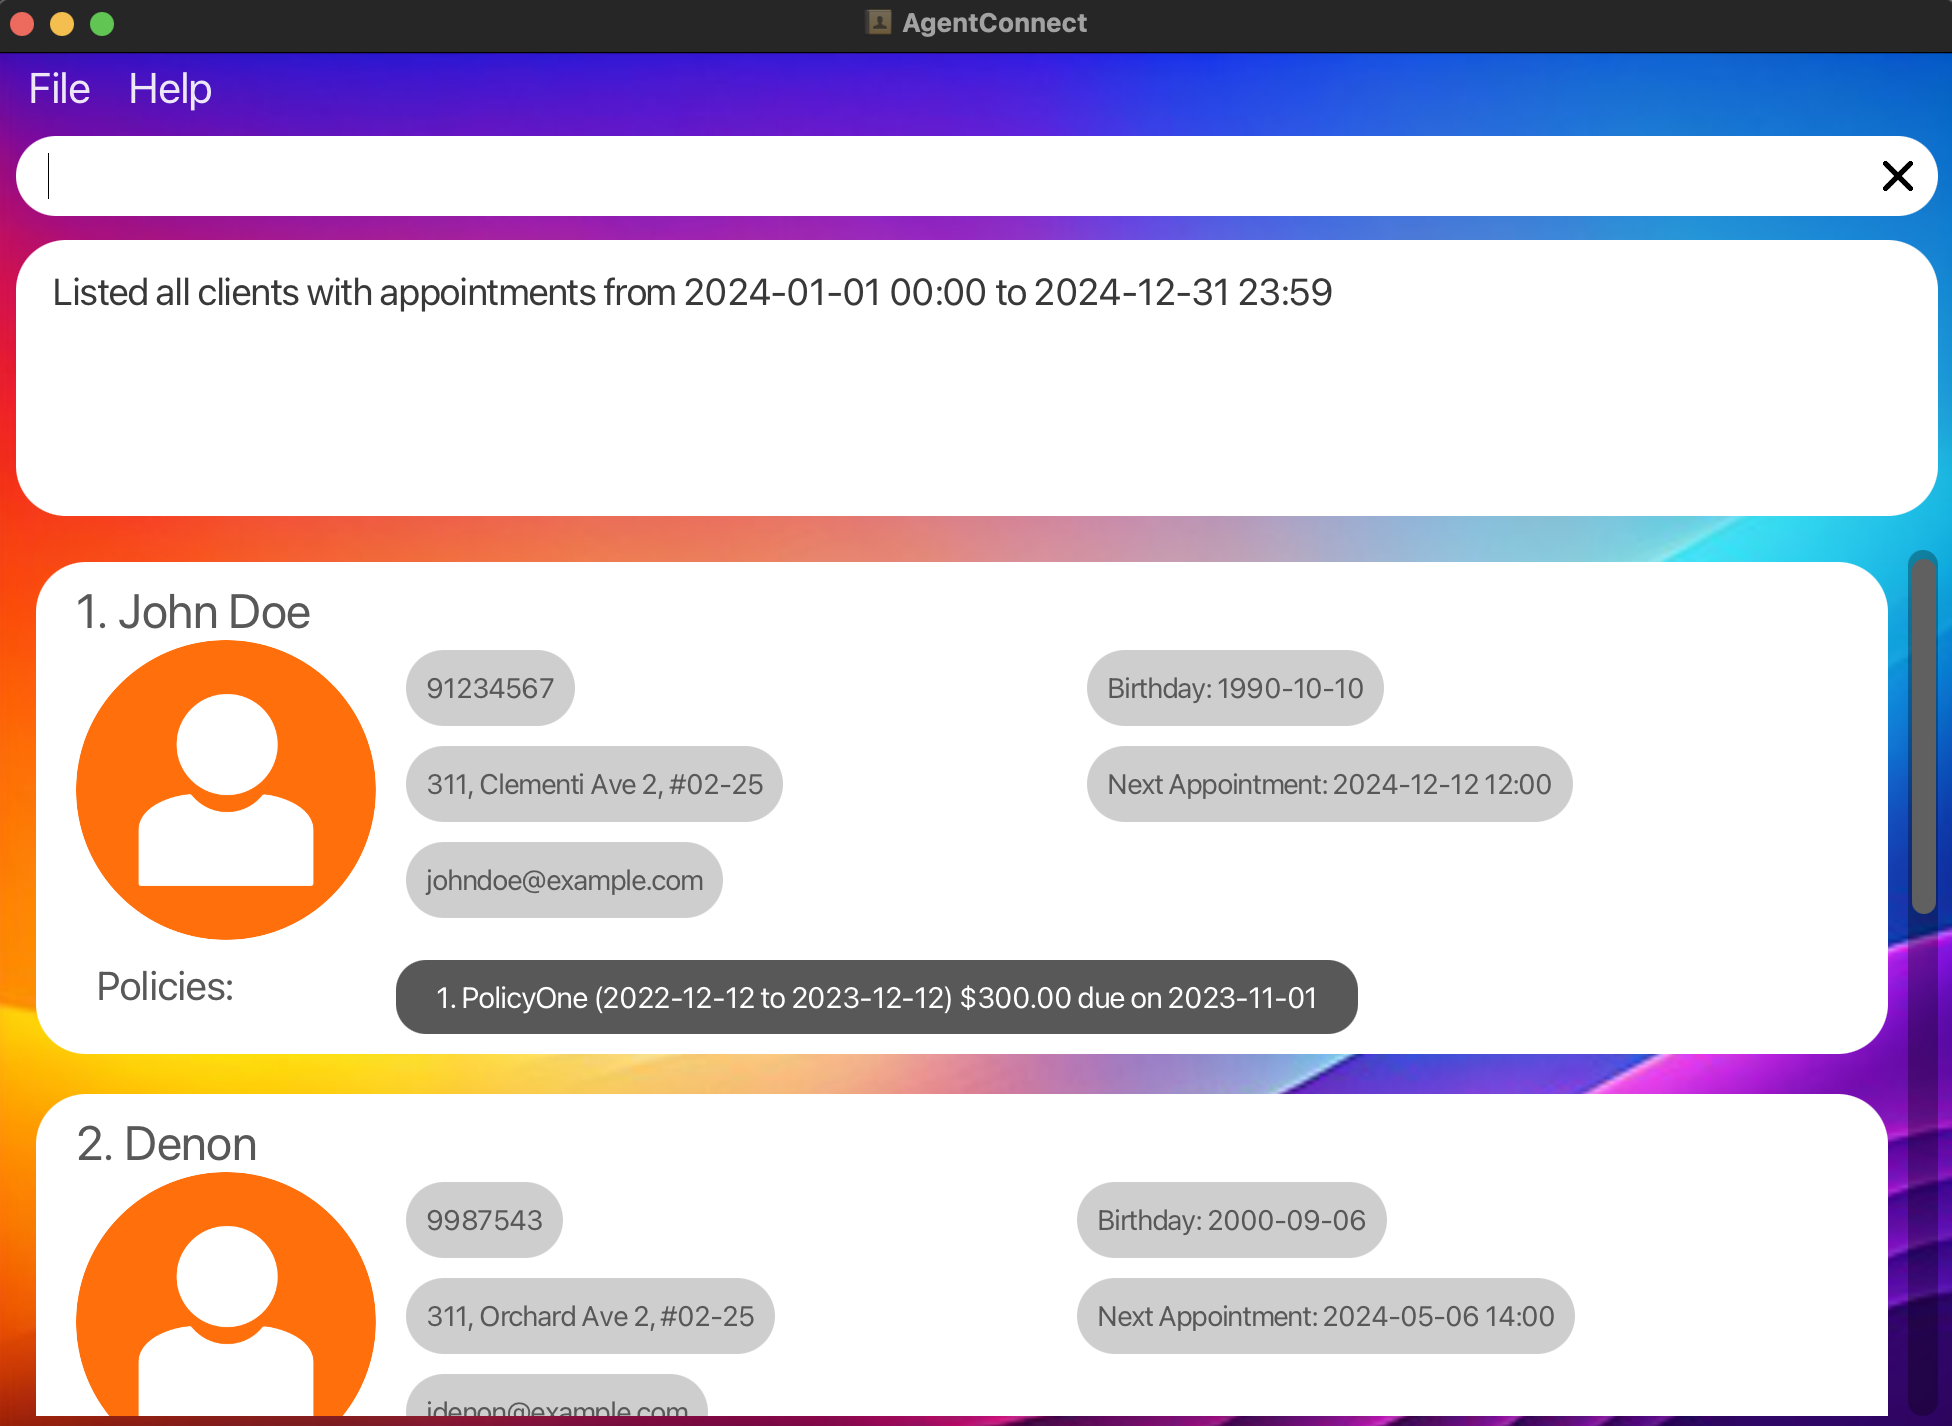
Searching birthdays : search b/
Finds clients who have birthdays on a specific date or within a date range.
Format:
Single date search:
search b/ <DATE>
Range date search:
search b/ <START DATE> to <END DATE>
-
Parameters:
-
DATE: A specific date inyyyy-mm-ddformat. -
START DATE: A specific start date inyyyy-mm-ddformat. -
END DATE: A specific end date inyyyy-mm-ddformat. - If it is a range date search, the
tokeyword is compulsory.
-
-
Usage:
- Single Date Search: Lists all clients whose birthdays fall on the specified date.
- Range Date Search: Lists all clients whose birthdays are within the given date range.
Examples:
-
Search by Specific Date: Finds all clients with a birthday on October 10, 1990.
search b/ 1990-10-10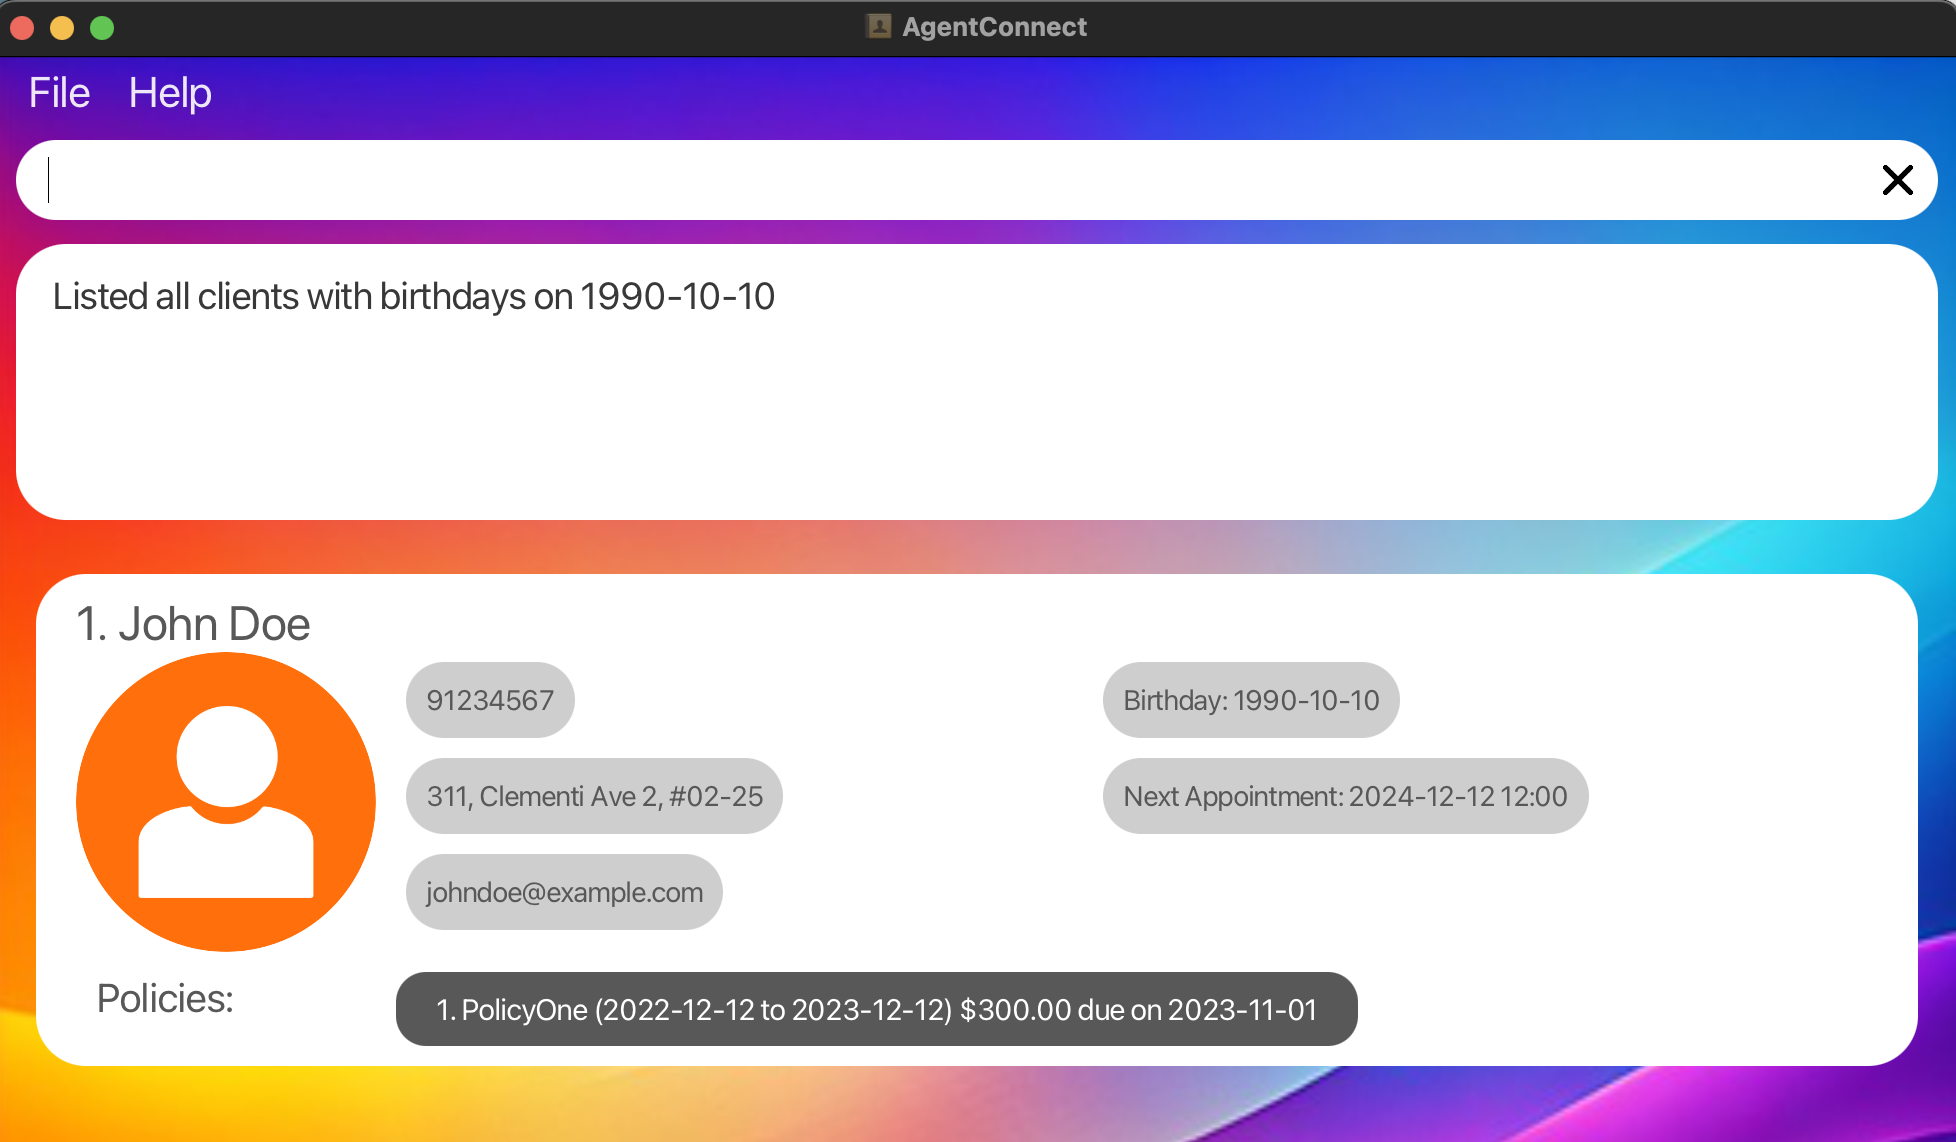
-
Search by Range Date: Finds all clients with a birthdays between January 1, 1990, to January 1, 2001.
search b/ 1990-01-01 to 2001-01-01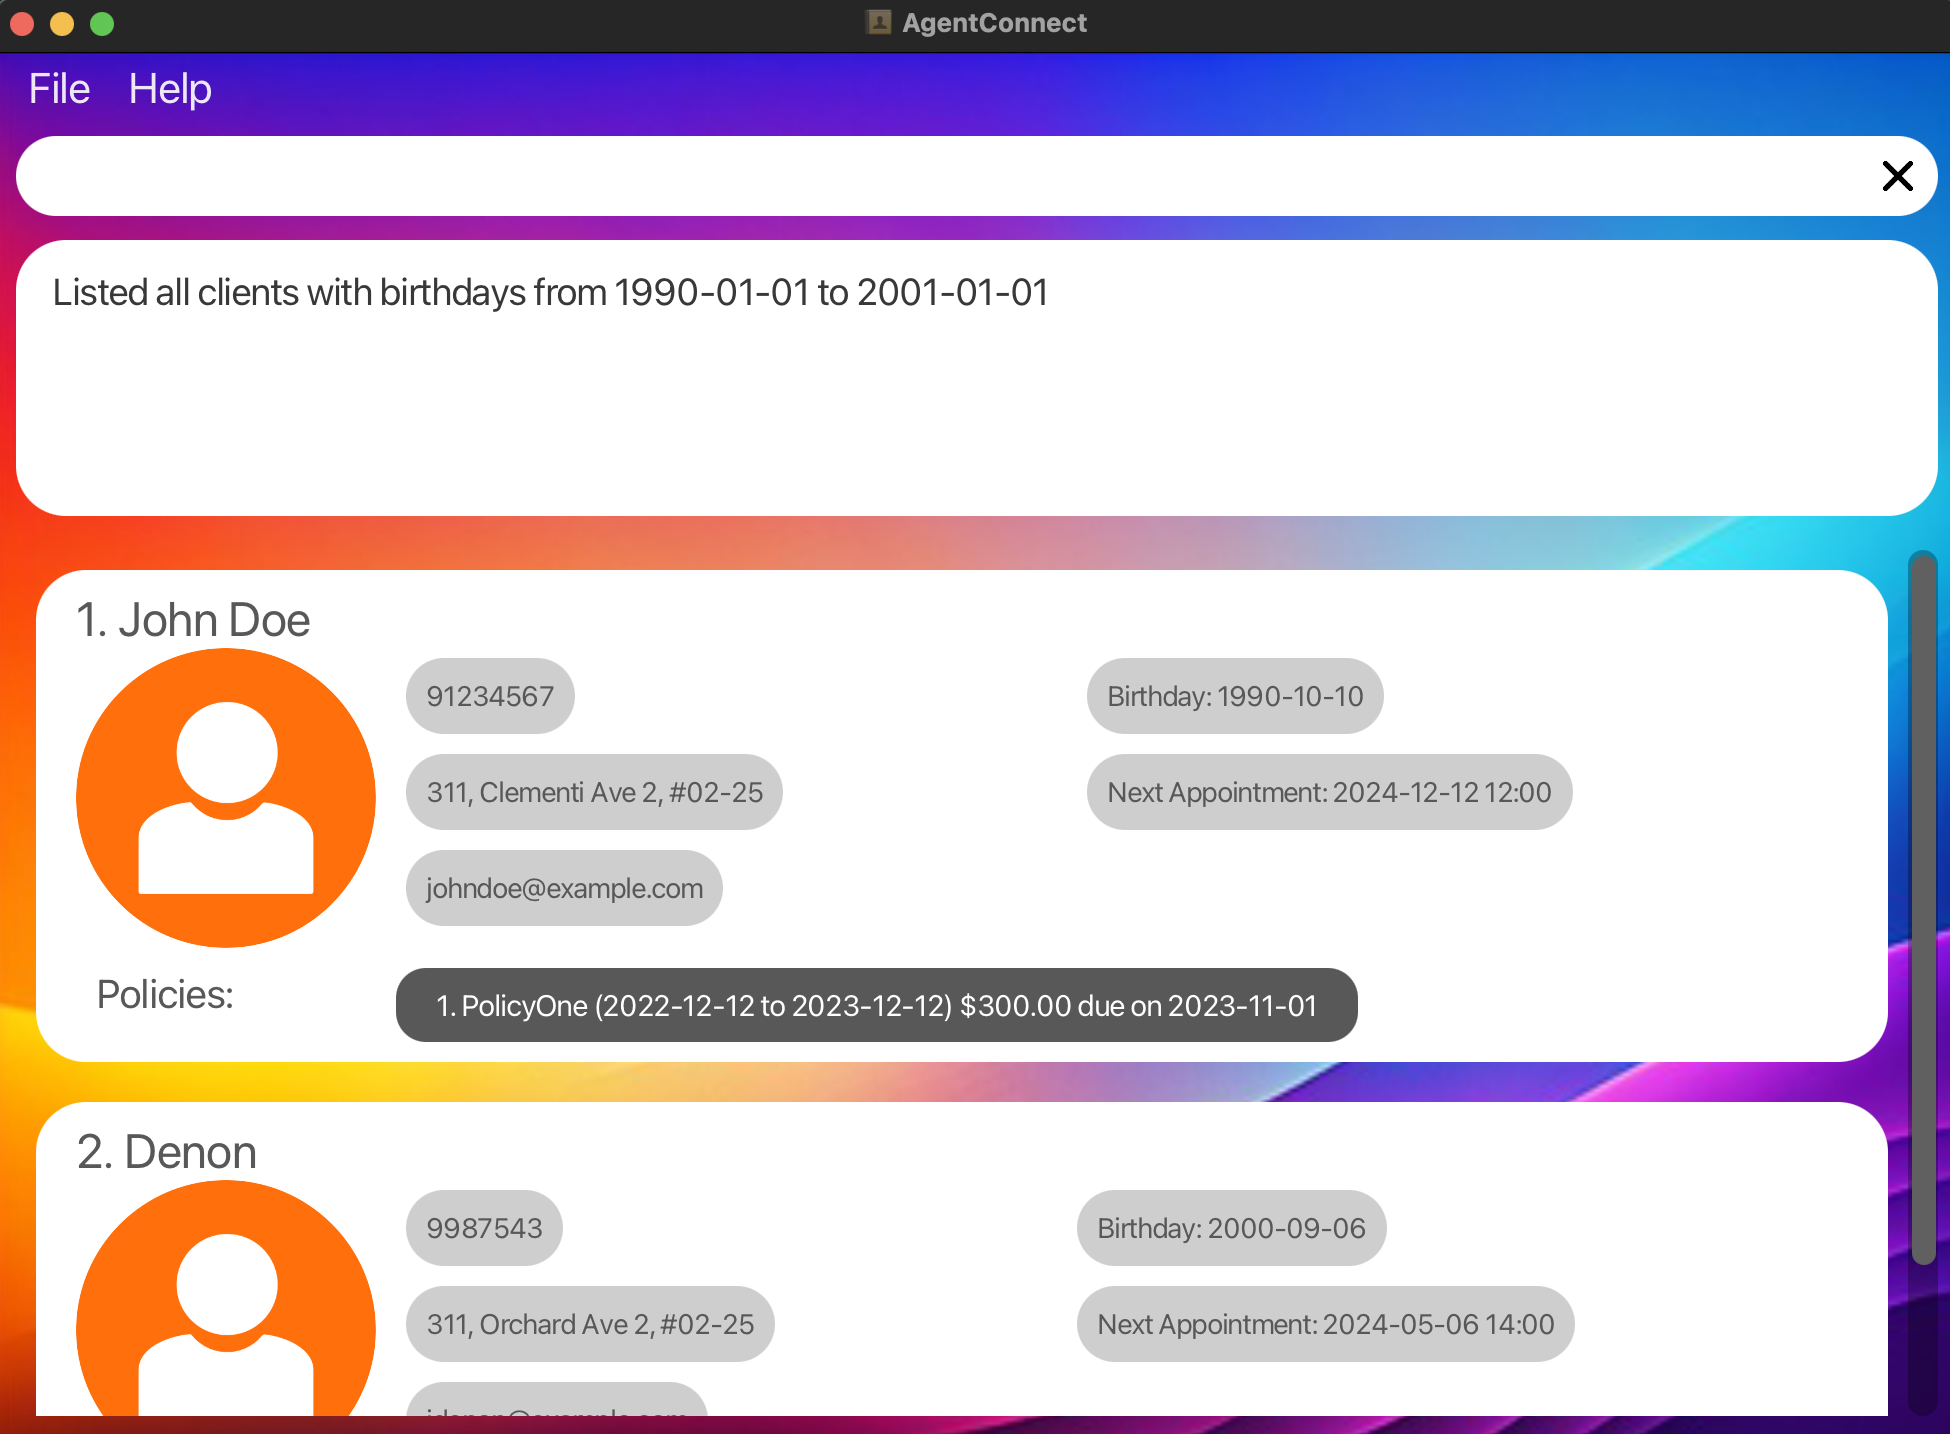
Searching policy : search p/
Find clients who currently owns a certain policy.
Format:
search p/ <POLICY_NAME>
-
Parameters:
-
POLICY_NAME: A specific policy name. -
POLICY_NAMEis not case-sensitive and whitespaces are ignored.
-
Example:
-
Search by Specific Policy: Finds all clients who own the policy named “PolicyOne”.
search p/ PolicyOne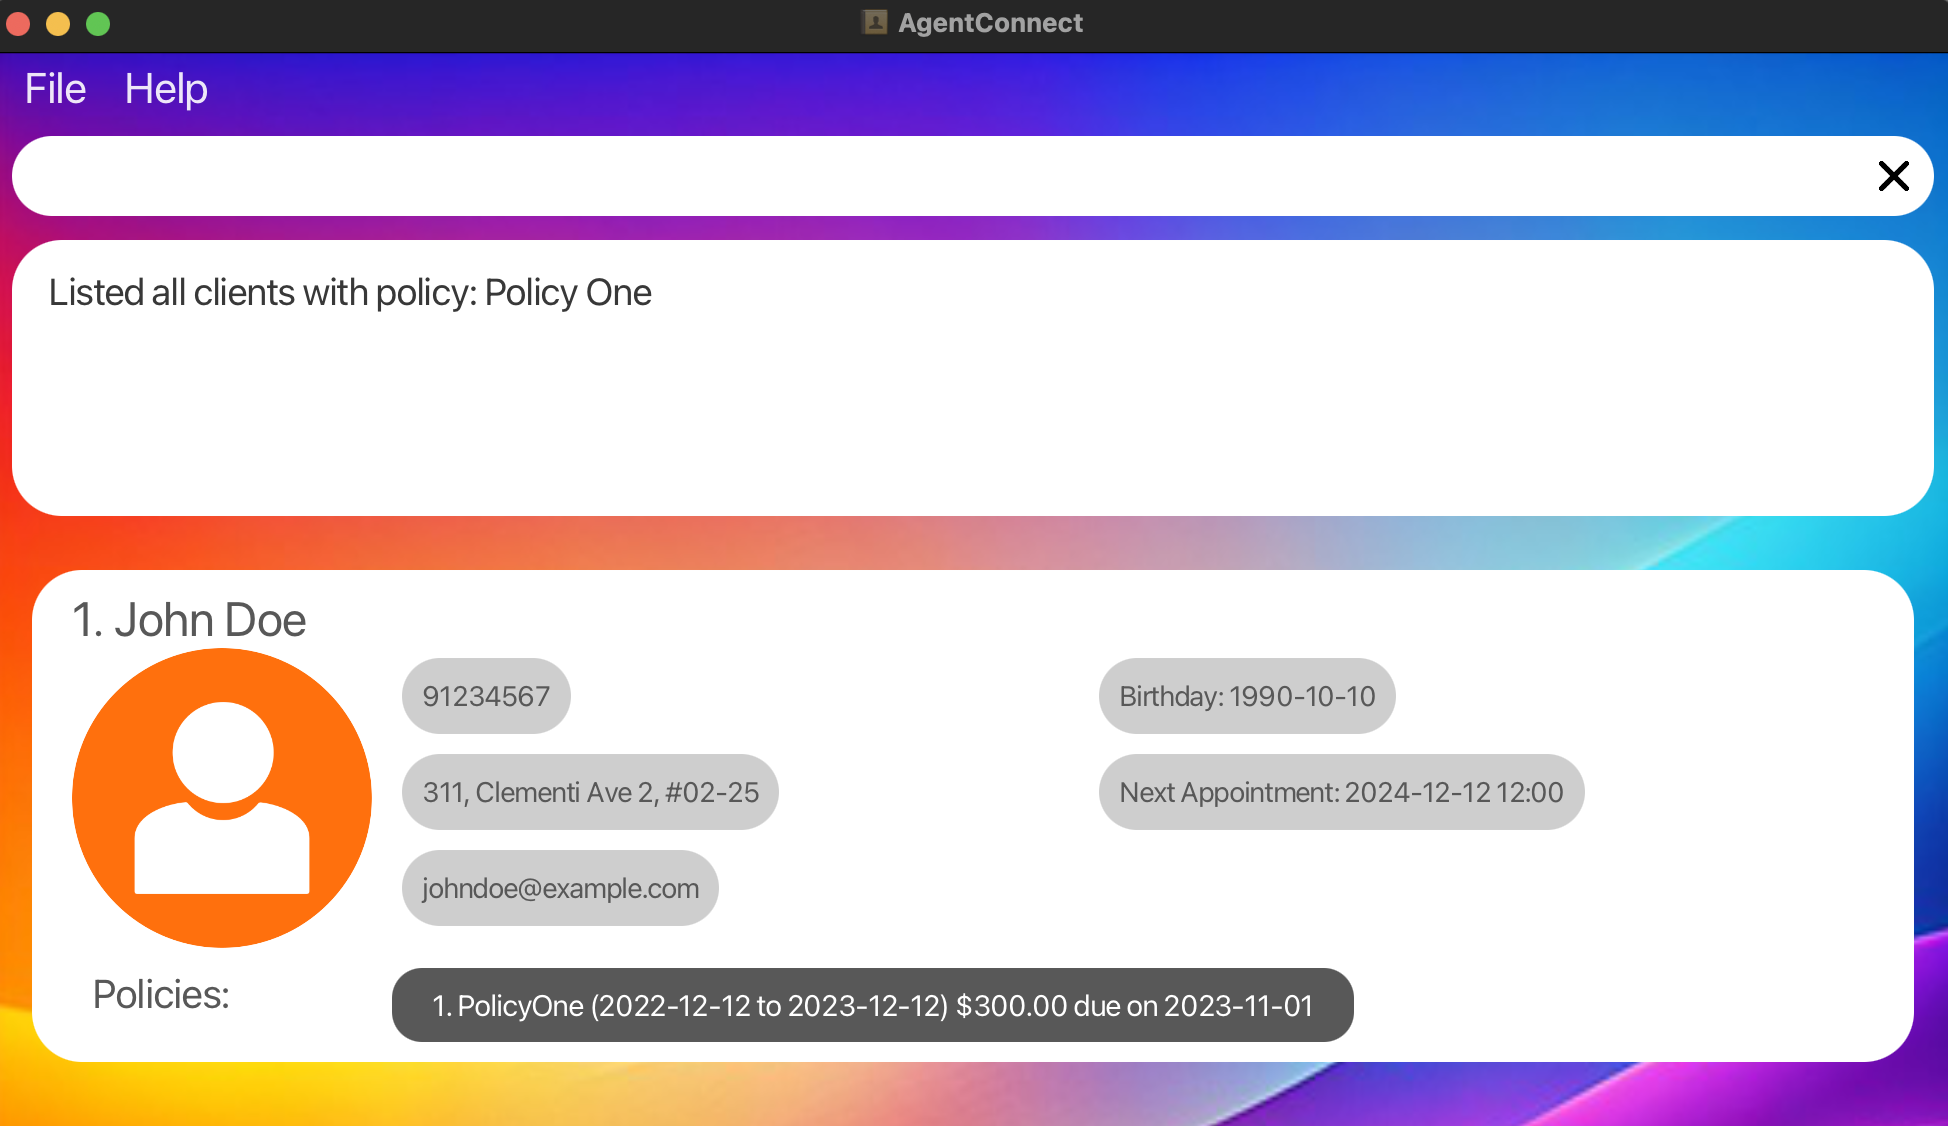
Policy Management
The policy management section contain commands that allows you to manage policy-related information, such as assigning policy, deleting policy and updating policy payment.
find or search commands to trigger a UI refresh.
| Action | Command Format | Command Example |
|---|---|---|
| Assign a Policy | assign INDEX pon/<POLICY_NAME> pos/<START_DATE> poe/<END_DATE> paydate/<PAYMENT_DUE_DATE> amt/<AMOUNT_DUE> |
assign 1 pon/Health Insurance pos/2022-01-01 poe/2023-01-01 paydate/2022-12-01 amt/300.00 |
| Delete a Policy | delete <INDEX> po/<POLICY_INDEX> |
delete 3 po/2 |
| Mark Policy as Paid | paid <INDEX> po/<POLICY_INDEX> |
paid 2 po/3 |
Assigning a policy : assign
Assign policy to a client.
Format:
assign <INDEX> pon/<POLICY NAME> /pos<POLICY START DATE> /poe <POLICY END DATE> /paydate <INSURANCE DUE DATE> /amt <AMOUNT DUE>
-
Parameters:
-
POLICY NAMEis case-sensitive. -
POLICY START DATEandPOLICY END DATErefer to the duration of the policy’s coverage. -
POLICY START DATEandPOLICY END DATEmust be in the formatyyyy-mm-dd. -
POLICY START DATEandPOLICY END DATEcannot be the same date. -
POLICY START DATEcan only start from 1900-01-01 and onwards. -
INSURANCE DUE DATEmust be in the formatyyyy-mm-dd. -
INSURANCE DUE DATEcannot be earlier than thePOLICY START DATE. -
INSURANCE DUE DATEcannot be later than thePOLICY END DATE. -
AMOUNT DUEmust be a positive number with up to 2 decimal places ($sign is not required. For example, /amt 200.00 or /amt 358.00 is the correct format)
-
Example:
- Assign a policy to the client listed at index 1 with the following information:
- Policy Name: PolicyOne
- Policy start date: 2022-12-12
- Policy end date: 2023-12-12
- Premium due date: 2023-11-01
- Amount Due: $300.00
assign 1 pon/PolicyOne pos/2022-12-12 poe/2023-12-12 paydate/2023-11-01 amt/300.00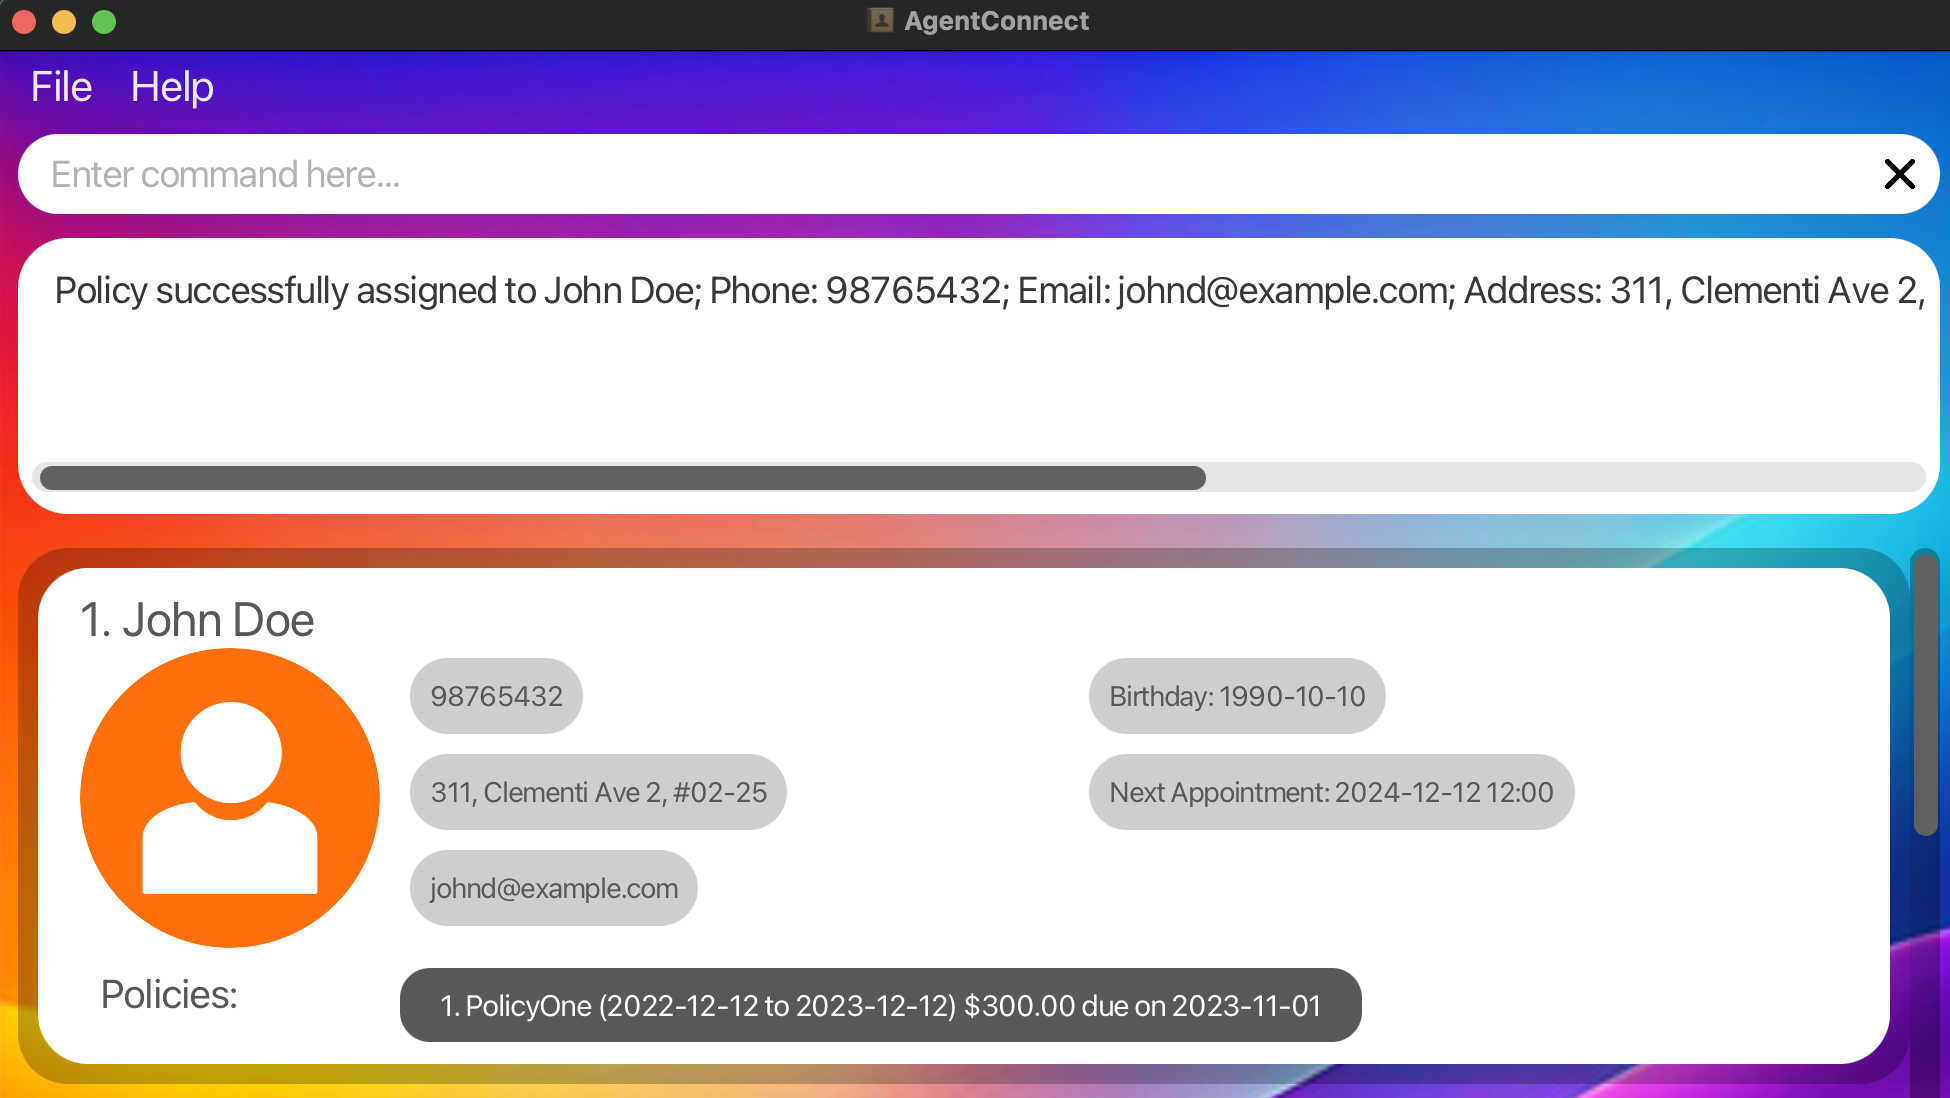
Deleting a policy : delete
Deletes the specified policy from the specified client using the index of the client and policy.
Format:
delete <INDEX> po/<POLICY_INDEX>
Deletes the policy at the specified POLICY_INDEX of the client at the specified INDEX.
-
Parameters:
-
INDEX: The index of the client in the client list. -
POLICY_INDEX: The index of the policy to be deleted. - The index refers to the index number shown in the displayed client list. The index must be a positive integer 1, 2, 3, …
- The policy index refers to the index number shown in the displayed client list. The index must be a positive integer 1, 2, 3, …
-
Examples:
- Delete the 1st policy of the 1st person in the address book.
delete 1 po/1 - Delete the 1st policy of the 3rd person in the address book.
delete 3 po/1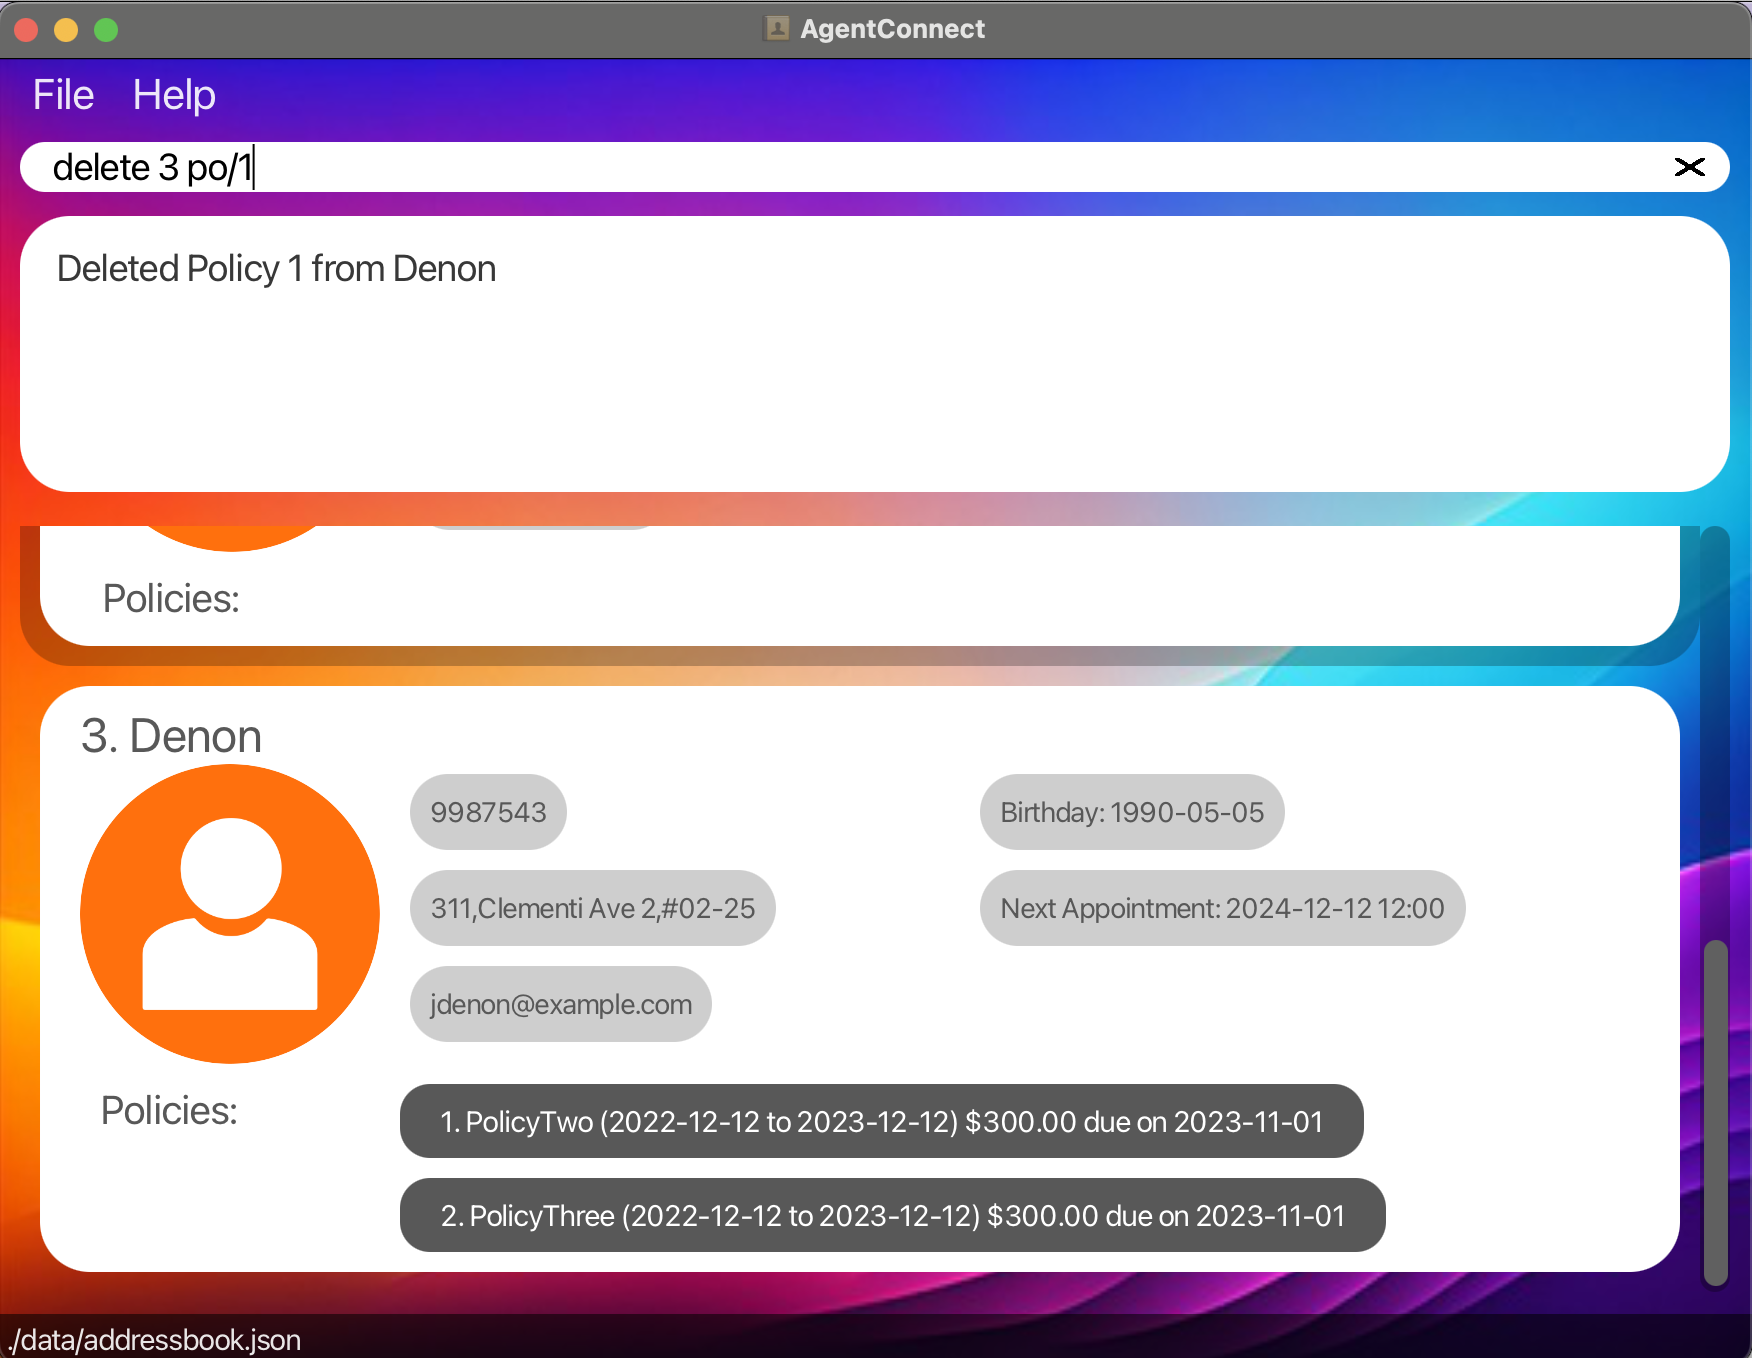
Marking a policy payment installment as paid : paid
Marks a policy payment installment as paid for a client.
Format:
paid <INDEX> po/<POLICY_INDEX>
-
Parameters:
-
INDEX: The index of the client in the client list. -
POLICY_INDEX: The index of the policy to be marked as paid. - The index refers to the index number shown in the displayed client list. The index must be a positive integer 1, 2, 3, …
- The policy index refers to the index number shown in the displayed client list. The index must be a positive integer 1, 2, 3, …
-
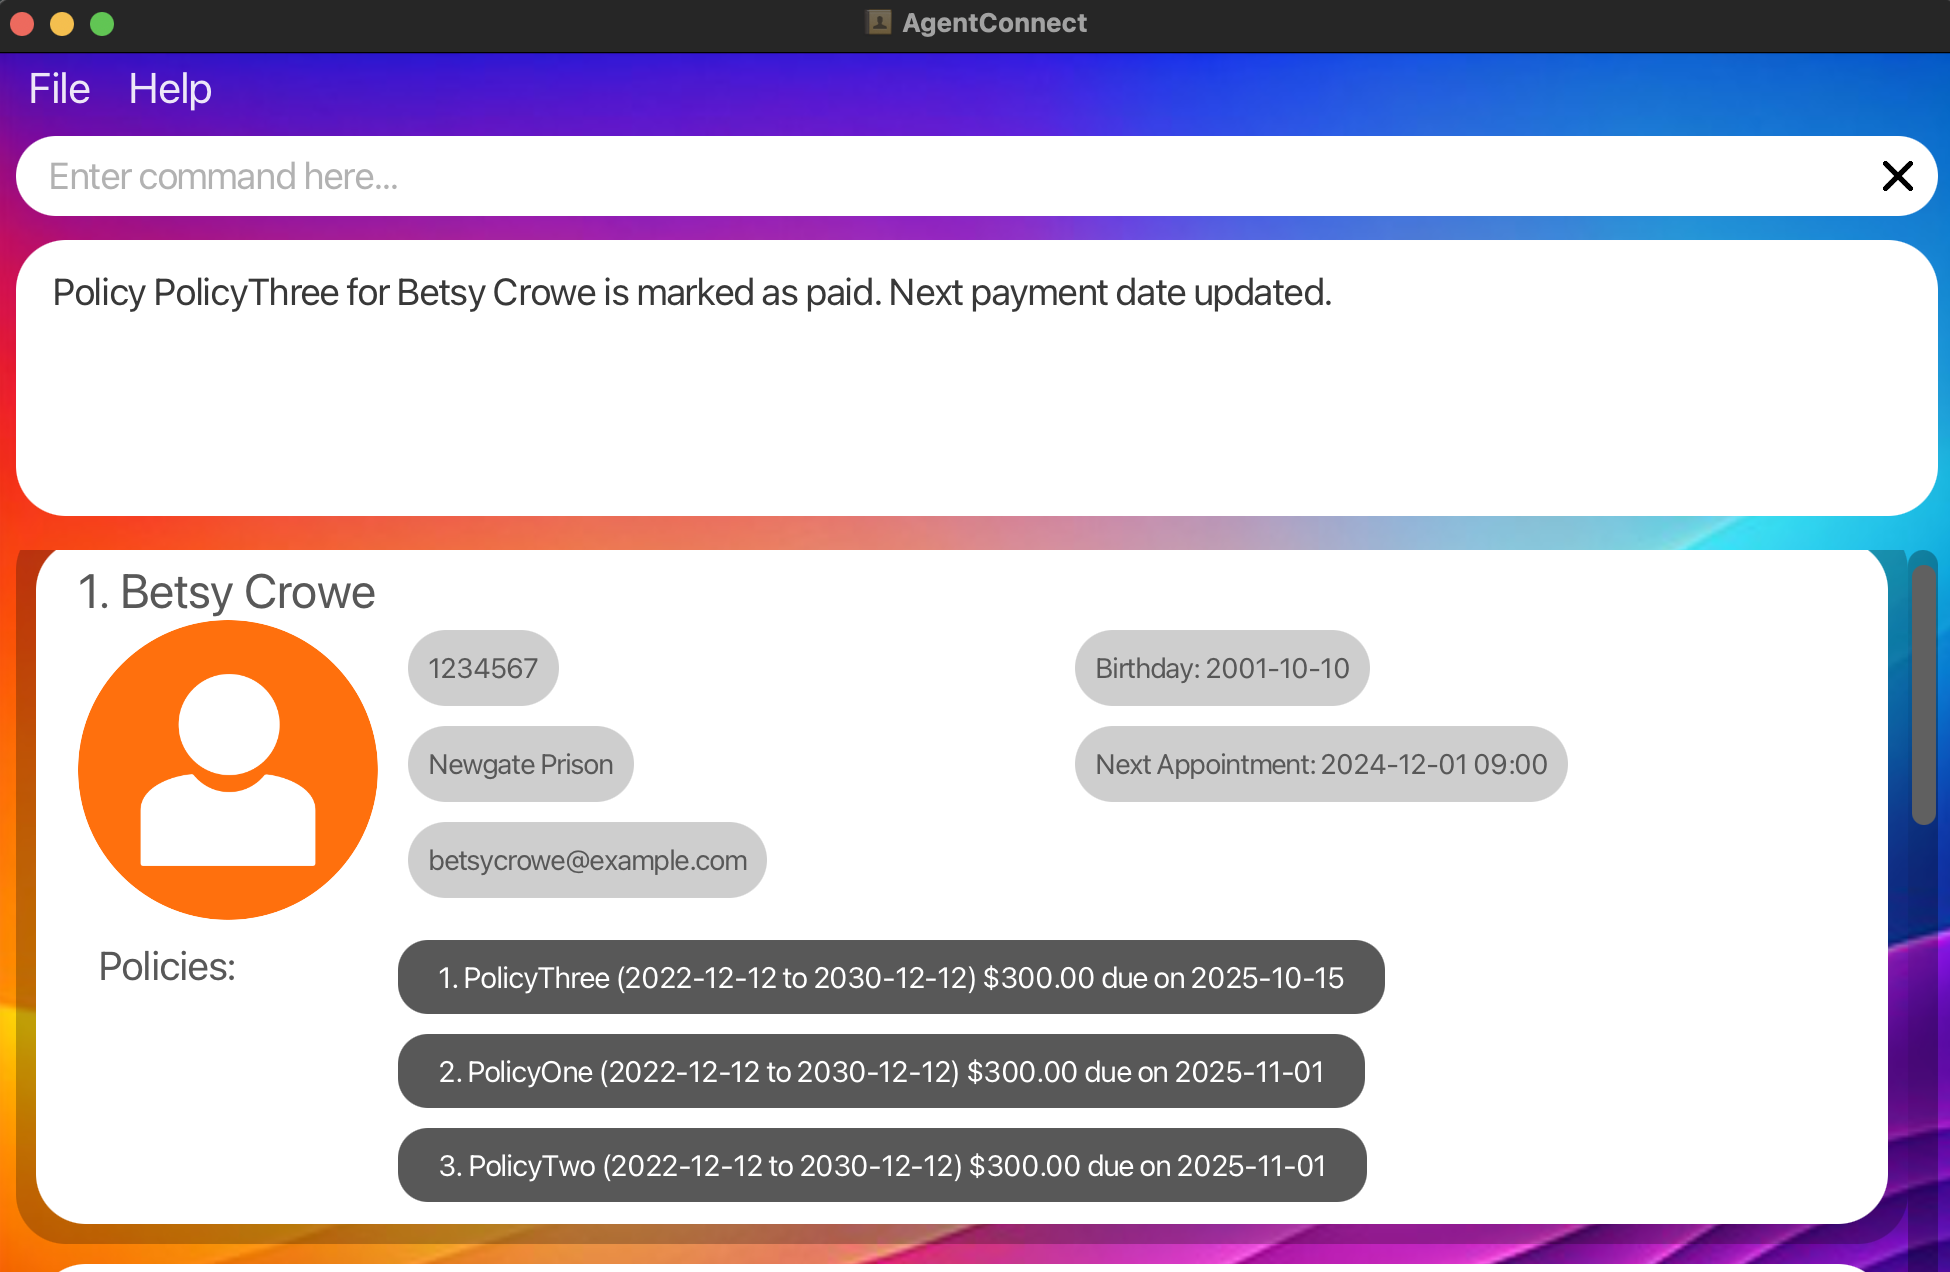
1. The payment due date of the policy will be updated to the next scheduled date (ie. one year later). The amount due will be set to 0 once the final installment of the insurance payment is completed.
2. Sometimes, after marking a policy payment installment of a client as paid, the user interface may not reflect the changes immediately. If this occurs, try double-clicking on the particular client profile card. The user interface will show the updated payment due date.
Examples:
-
Marking a Policy Payment Installment as Paid:
paid 1 po/ 1Marks the policy associated with index 1 as paid for the client at index 1.
Advanced Features
| Action | Command Format | Command Example |
|---|---|---|
| Undo the Last Command | undo |
undo |
| Redo the Last Undo Work | redo |
redo |
| Clear All Entries | clear |
clear |
Undo a command : undo
Undo the last command. This command works for add, edit, delete client and clear commands.
Format: undo
- Undo the last command to restore the address book to the state before the last command.
undo command does not work for assign and deletion of policies, so any commands before the assign/delete of policies
will be undone. For example, if I add a client, assign a policy to that client, then enter undo, it will undo the add command.
Examples:
-
delete 1followed byundowill restore back the deleted client at index 1. -
clearfollowed byundowill restore back all the deleted clients.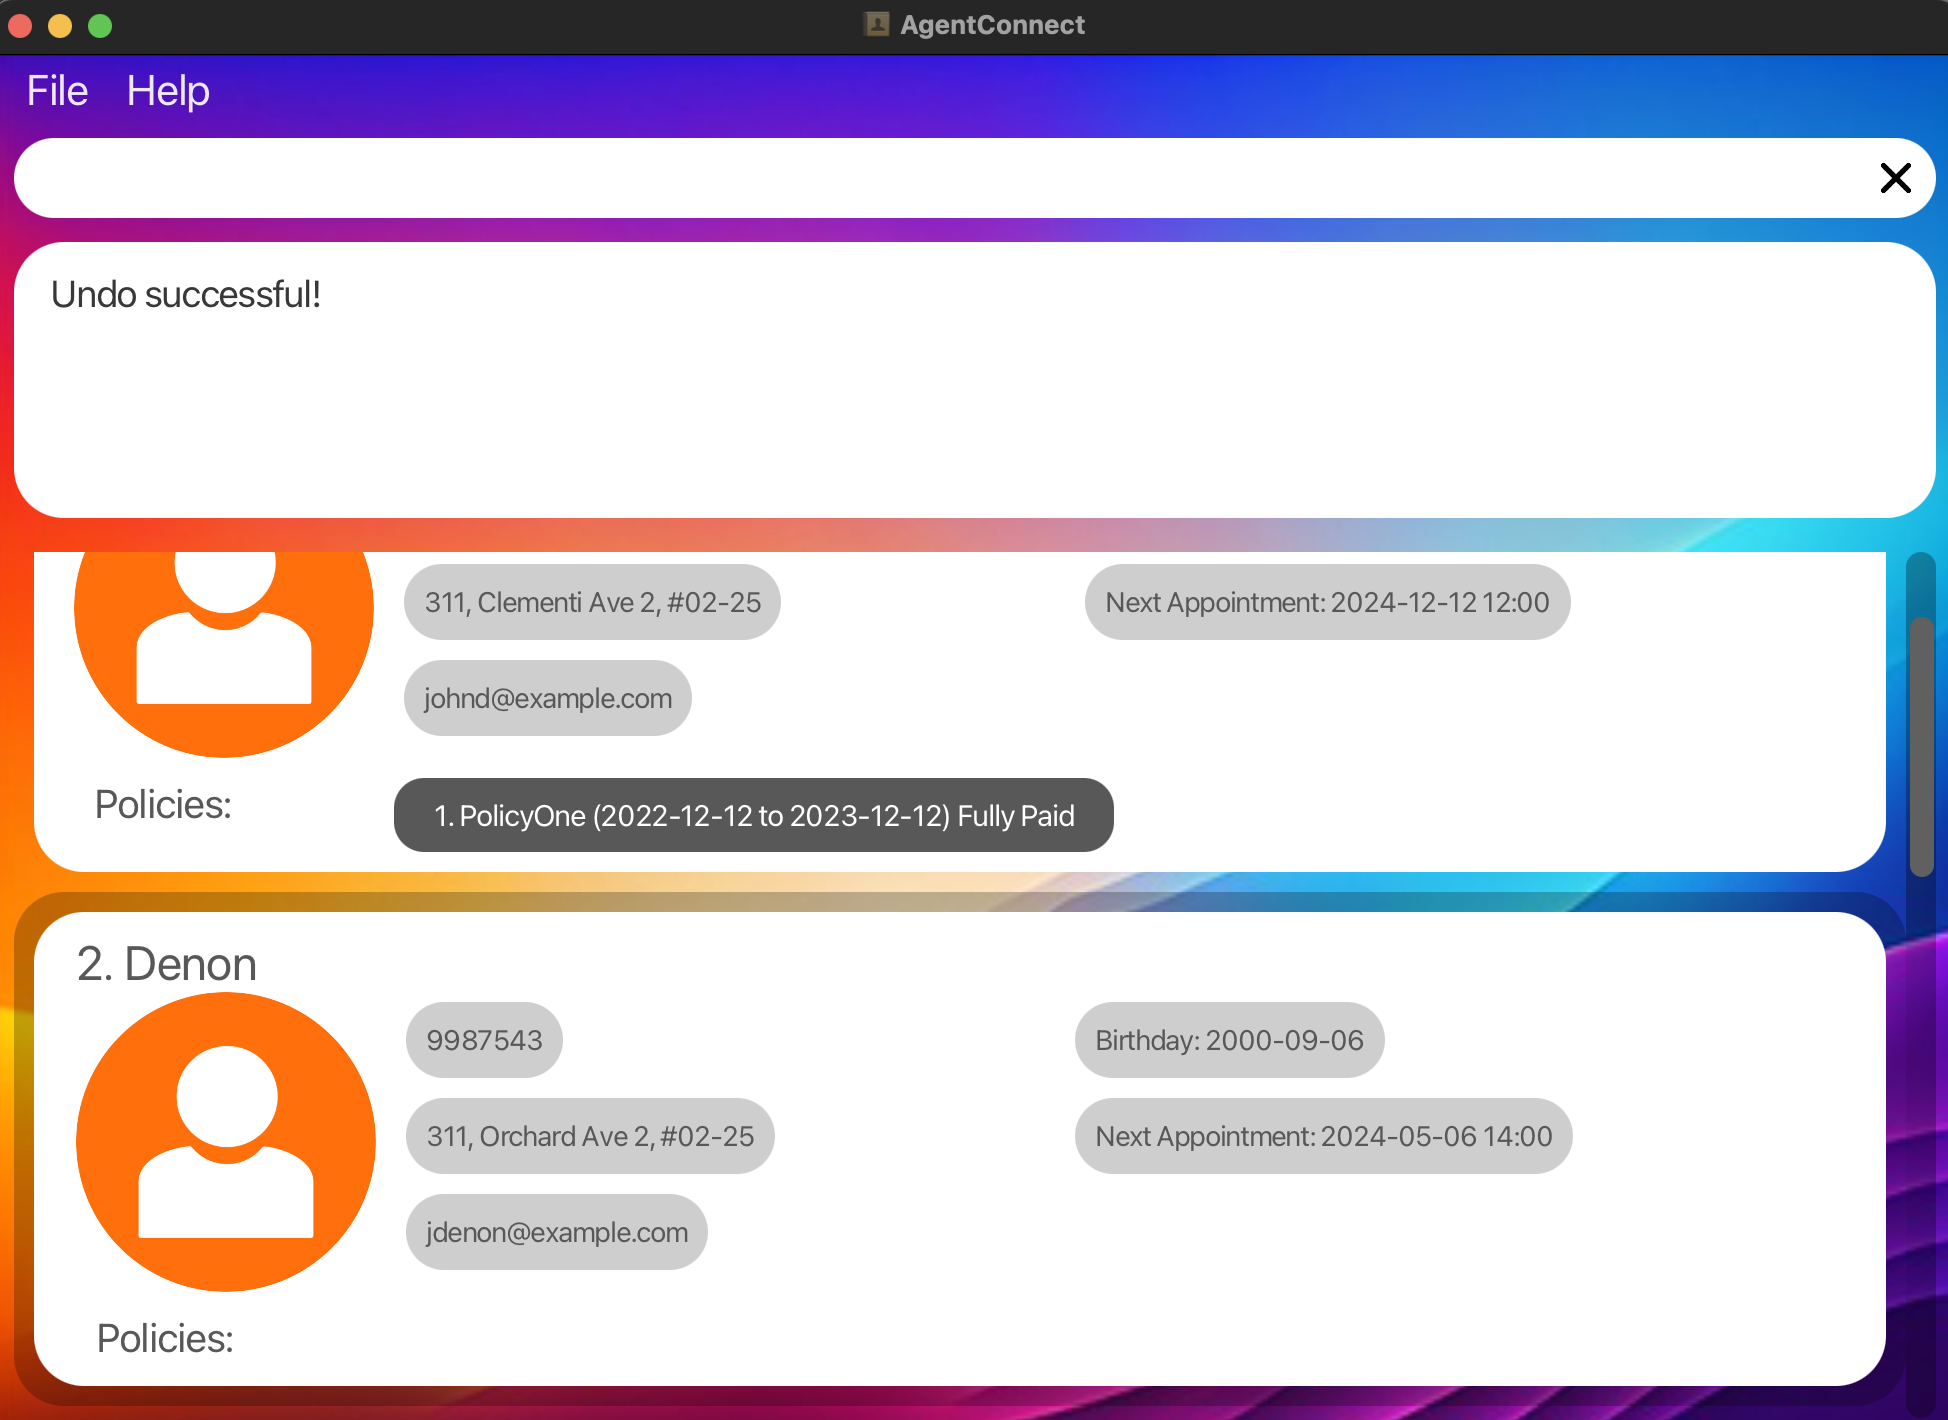
Redo a command : redo
Redo the last undo. Works for add, edit, delete client and clear commands.
Format: redo
- Redo the last undo command to restore the address book to the state before the undo command.
redo command does not work for assign and deletion of policies.
Examples:
-
delete 1followed byundofollowed byredowill delete the client at index 1 again. -
clearfollowed byundofollowed byredowill clear all the entries again.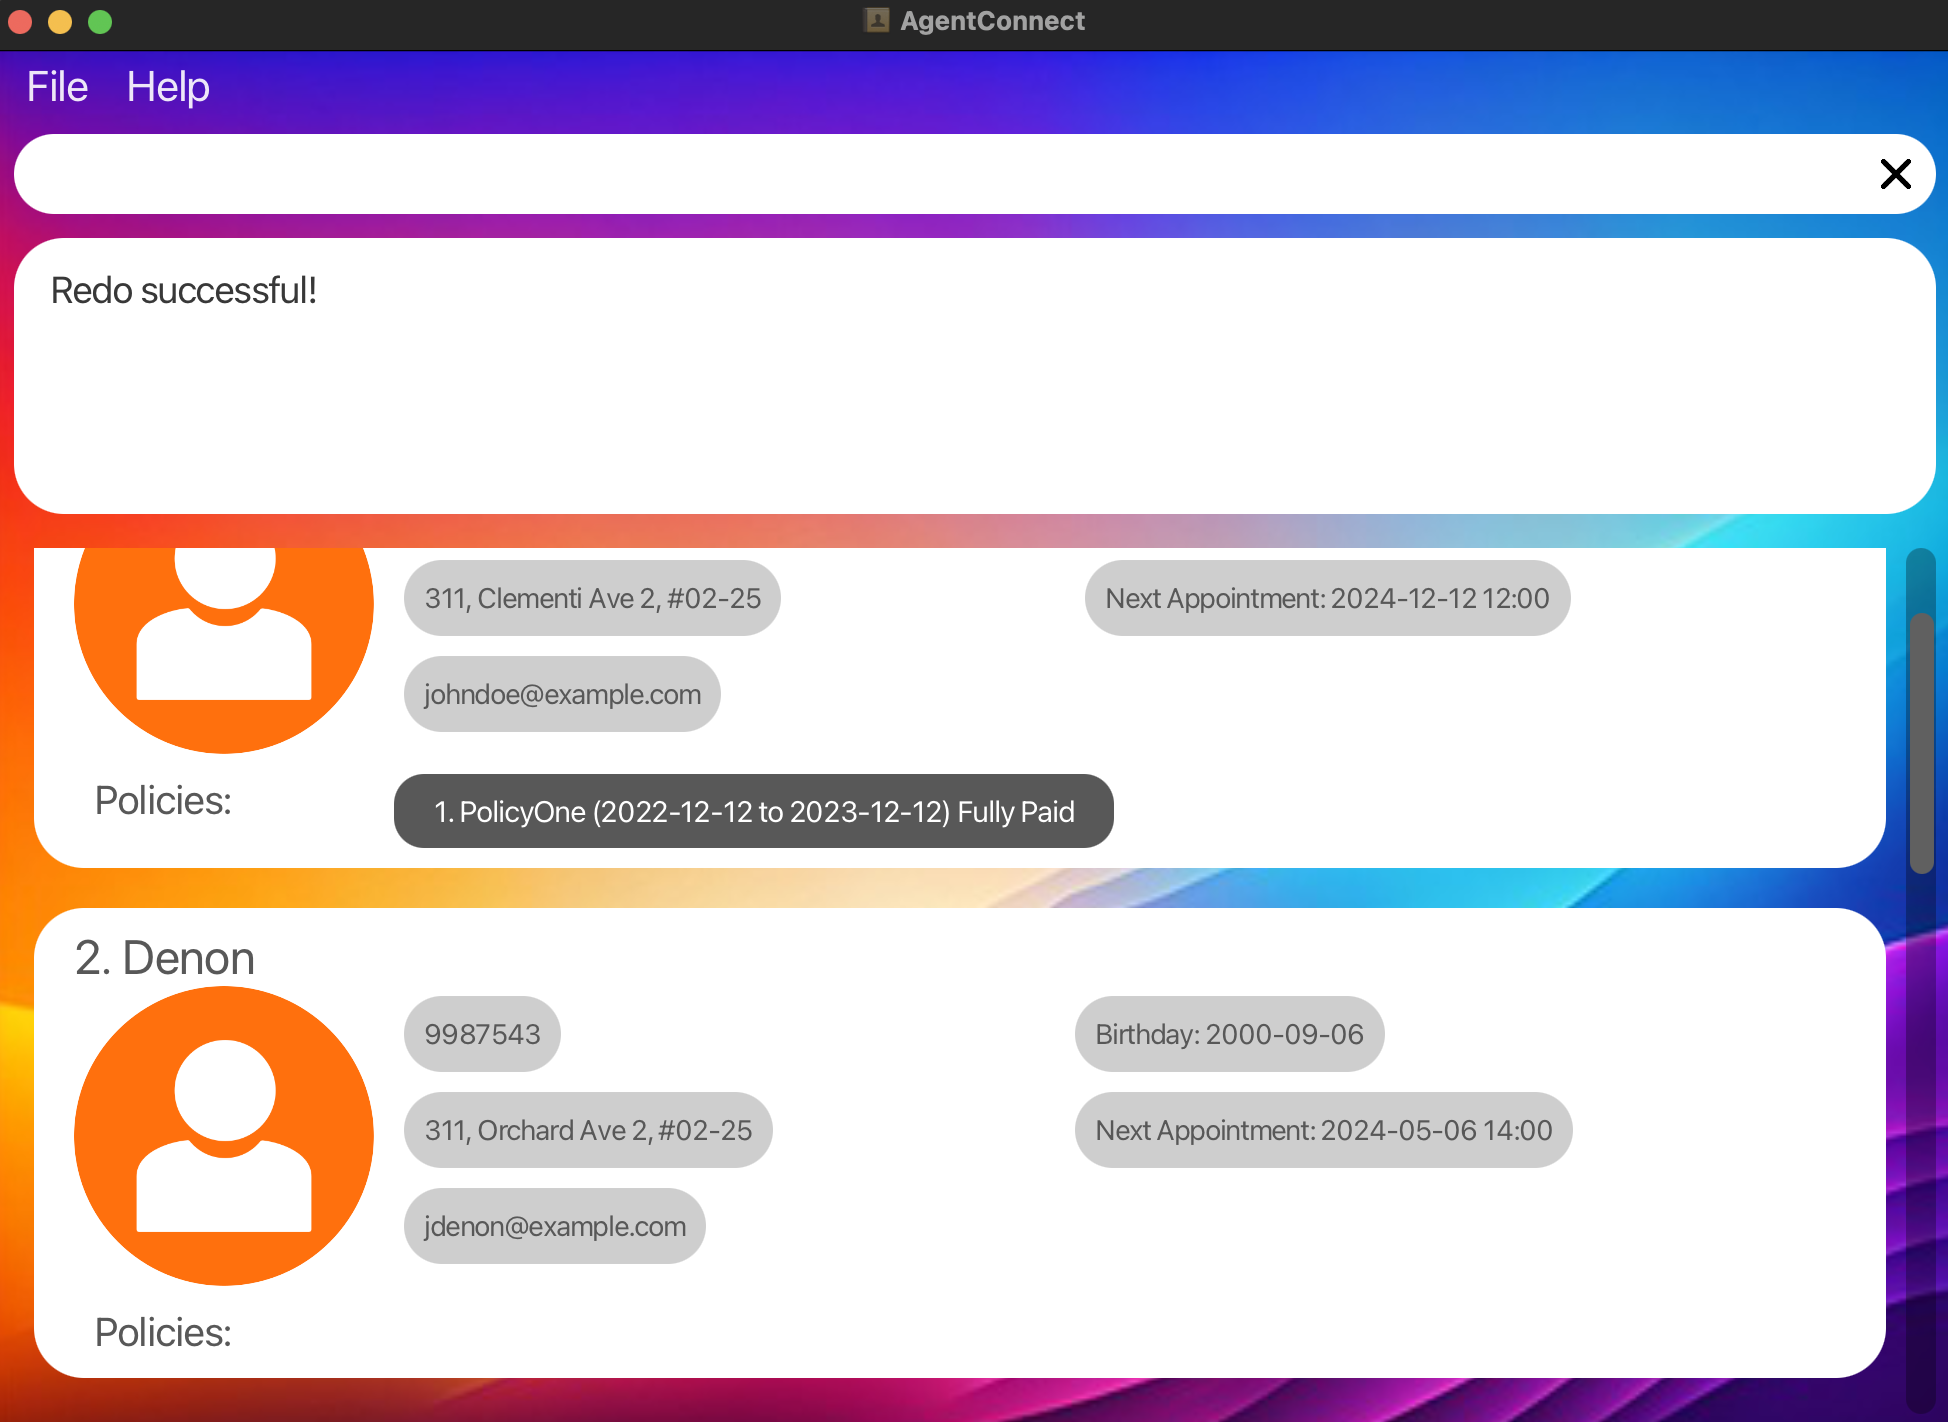
Clearing all entries : clear
Clears all entries from the address book.
Format: clear
clear command and want to revert back, do not run any other commands.
Run undo immediately to restore the data.
Upon entering the clear command, a pop up for confirmation will appear. Do not close or minimize the
CLI interface when the pop up is displayed. This will cause the program to crash.
Editing the data file
AddressBook data are saved automatically as a JSON file [JAR file location]/data/addressbook.json. Advanced users are welcome to update data directly by editing that data file.
Furthermore, certain edits can cause the AddressBook to behave in unexpected ways (e.g., if a value entered is outside of the acceptable range). Therefore, edit the data file only if you are confident that you can update it correctly.
Frequently Asked Questions (FAQ)
Q: How do I check if I have Java installed?
A: Open the Command Prompt or Terminal and type java -version. If Java is installed, it will show the version number. For more information, you can refer here.
Q: Can I run AgentConnect on a Mac or Linux computer?
A: Yes! As long as you have Java 17 or above installed, AgentConnect will work on Windows, Mac, and Linux.
Q: How do I back up my data?
A: Your data is stored in the addressbook.json file in the data folder. Copy this file to a safe location to back up your data.
Q: What happens if I enter the wrong command?
A: AgentConnect will show an error message explaining what went wrong. You can then try the command again.
Q: Can I assign multiple policies to one client?
A: Yes, you can assign multiple policies by using the assign command multiple times for the same client.
Known Issues
-
Multiple Screens: If you use multiple monitors and move AgentConnect to a secondary screen, it may open off-screen if that monitor is disconnected.
Solution: Delete thepreferences.jsonfile in the application folder before restarting AgentConnect. -
Help Window Minimization: If you minimize the Help window and try to open another help window (using
helpcommand, F1 or clicking the help option in the user interface), the original help window will still be minimized. There will be no new help window pop up.
Solution: Restore the minimized Help window manually.
Command Summary
| Action | Command Format |
|---|---|
| Adding a Client |
add n/<NAME> p/<PHONE_NUMBER> e/<EMAIL> addr/<ADDRESS> b/<BIRTHDAY> appt/<APPOINTMENT>Example: add n/John Doe p/91234567 e/john@example.com addr/123 Street b/1990-01-01 appt/2024-12-12 14:00
|
| Listing All Clients | list |
| Deleting a Client |
delete <INDEX> or delete <NAME>Example: delete 3 or delete John Doe
|
| Editing Client Details |
edit INDEX [n/NAME] [p/PHONE] [e/EMAIL] [addr/ADDRESS] [b/BIRTHDAY] [appt/APPOINTMENT] [po/POLICY_INDEX pon/POLICY_NAME pos/START_DATE poe/END_DATE paydate/PAYMENT_DUE_DATE amt/AMOUNT_DUE]Example: edit 2 p/98765432
|
| Sorting Clients |
sort <CRITERIA> <ORDER>Example: sort b/ asc
|
| Locating Clients by Name |
find <KEYWORD> [MORE_KEYWORDS]Example: find Alice
|
| Searching Appointments |
search a/ <DATETIME>Example: search a/ 2024-10-10 23:00
|
| Searching Birthdays |
search b/ <DATE>Example: search b/ 2000-03-15
|
| Searching Policies |
search p/ <POLICY_NAME>Example: search p/ sample Policy
|
| Assigning a Policy |
assign INDEX pon/<POLICY_NAME> pos/<START_DATE> poe/<END_DATE> paydate/<PAYMENT_DUE_DATE> amt/<AMOUNT_DUE>Example: assign 1 pon/Health Insurance pos/2022-01-01 poe/2023-01-01 paydate/2022-12-01 amt/300.00
|
| Deleting a Policy |
delete <INDEX> po/<POLICY_INDEX> Example: delete 3 po/2
|
| Mark Policy Payment |
paid <INDEX> pon/<POLICY_INDEX> Example: paid 2 pon/3
|
| Undo a Command | undo |
| Redo a Command | redo |
| Clearing All Entries | clear |
| Exiting the Program | exit |
| Viewing Help | help |